
Spam is a nuisance most everyone with an online presence or email account(s) has to face. There are many ways to combat email spam and we’re going to show you how to take effective steps to reduce and prevent spam from reaching your inbox.
For those of you with a cPanel account, there are many tools inside of cPanel that are available for you to use. We see most customers taking advantage of the email filters, global email filters, and enabling Apache SpamAssassin on their accounts. It’s a very straightforward process to create email filters at an account level or global level as well as turn on SpamAassassin for your inboxes.
To get started, you’ll want to log into cPanel and follow the instructions below.
How to Up Email Filters in cPanel
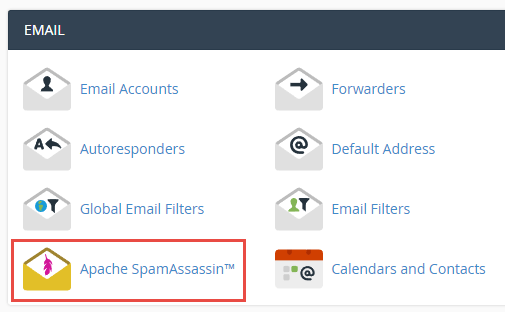
Once you’re logged into cPanel you’ll want to search for the EMAIL. Inside of the EMAIL section, you’ll see two icons. One for Global Email Filters and one for Email Filters.
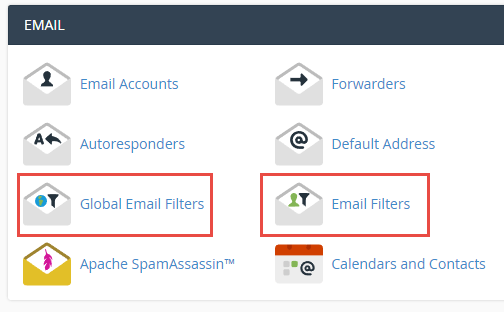
Navigating to Email Filters will allow you to manage your email filters for a particular email account while Global Email Filters will allow you to create email filters that will be applied to all of your email accounts, not just an individual account.
In this article we’re going to show you how to set up an email filter for an individual email account so you’ll want to click the Email Filters icon.
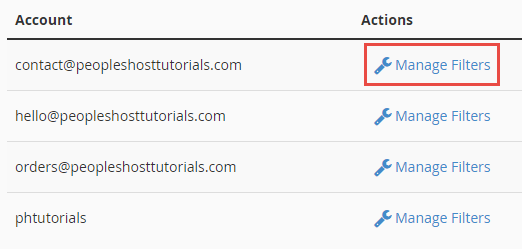
On the next page, you will see a list of all your email accounts. In the same row your email account is listed in, you’ll see the text Manage Filters. Click Manage Filters for the email account you want to create your first email filter for.
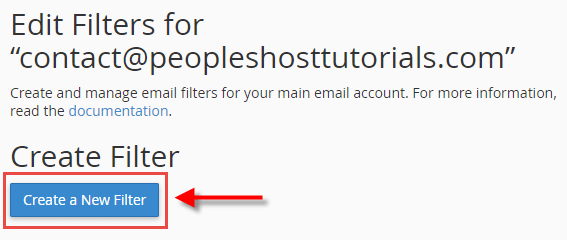
Click the blue button for Create a New Filter.
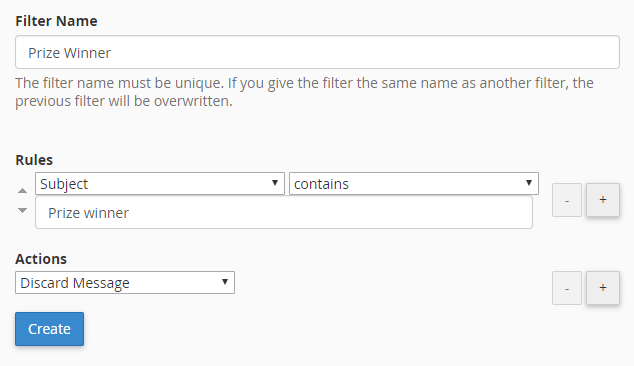
Name your filter. This can be anything you’d like, but make sure to name your filter something that you can easily identify if you ever need to make edits to it. This is also where you will create your rules. In this example, we’re creating a rule to look at any email’s subject that contains the words ‘prize winner’. If any emails are received with those words in the subject line, it will be deleted automatically.
There are many different rules and combinations you can set as well as additional actions. Choose the appropriate selection from each dropdown menu. After you’ve created your filter name, set the rules and actions click the Create button.

You can create as many filters as you’d like. Don’t forget to about the Global Email Filters as well! This will ensure all of your email accounts are protected with a filter if you are receiving similar spam emails to all of your accounts.
How to Enable Apache SpamAssassin
Now that you’ve successfully created an email filter inside of cPanel you’ll also want to check out Apache SpamAssassin. Apache SpamAssassin is an email utility that examines incoming email and tests for spam characteristics. It uses Bayesian spam filtering and network tests to screen incoming email.
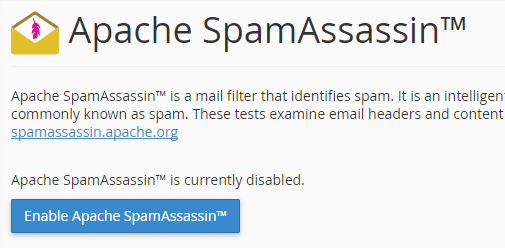
To enable SpamAssassin, you’ll want to click the Apache SPamAssassin icon located in the EMAIL section of cPanel. On the next page it’s very easy to enable. All you have to do is click the Enable Apache SpamAssassin button and voila!
We recommend that you keep the default setting for the score. This way it’s a nice middle ground on how conservative SpamAssassin will be at marking any incoming emails as spam. If an email is marked as spam you’ll be able to find it in the spam/junk folder when you check your email.
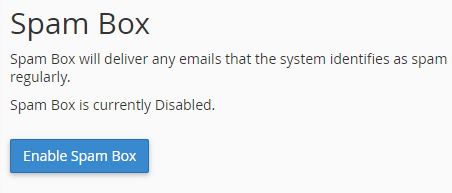
Another useful feature is the Spam Box. It’s a good idea to enable the Spam Box so you still have access to emails that were marked as spam. SpamAssassin isn’t perfect and may mark some of your legitimate emails as spam in the beginning. It is an intelligent email filter and will take some time to adapt.
Creating email filters and enabling Apache SpamAssassin will help greatly in reducing the amount of spam that hits your email’s inbox. You should see immediate relief after you create filters and enable SpamAssassin. If you have any questions or issues creating email filters don’t hesitate to reach out to support. A member of our support team will be ready to help.


