// How to Create an Addon Domain in cPanel //
The “Addon” domain functionality built into the cPanel control panel allows you to host multiple domains on one hosting account. Because of this you don’t need to have a separate hosting account for each domain you register and want to host or build a website for. Do keep in mind that there’s instances in which you’ll still want to have separate hosting accounts for your domains and websites (e.g., hosting client websites). This way a client can log into their own cPanel account without seeing other websites and domains on the same account that aren’t related to theirs.
So you’ve registered a new domain name and want to use it on your existing hosting account. What do you need to do next? Follow the guide below and you’ll have a new domain added to your cPanel account and ready to go within minutes.
- Update Your Domain’s Nameservers
- Create an Addon Domain in cPanel
- Create a Subdomain in cPanel
- DNS Propagation
1. Update Your Domain’s Nameservers
After you’ve registered a domain name you’ll need to update that domain’s nameservers. The nameservers you use dictate where your domain’s DNS is managed. If you’d like to learn more about DNS we have a blog article that dives deeper into DNS. In this article we’re going to assume you’re going to be using your PeoplesHost nameservers and host your website through PeoplesHost.
After signing up for your hosting account you’ll receive a Welcome email with your hosting account information. If you forgot to save your Welcome email you can view your account email history by following these instructions.
The Welcome email contains your account’s nameservers. Whether you register your domain name elsewhere or through PeoplesHost you’ll need to update your newly registered domain’s nameservers to point to your PeoplesHost nameservers that are included that Welcome email. They might look something like the following:
- dns1.ph50.peopleshostshared.com
- dns2.ph50.peopleshostshared.com
Here’s how to update your domain’s nameservers in your billing dashboard if you registered your new domain through PeoplesHost.
2. Create an Addon Domain in cPanel
Once you’ve updated the nameservers on your newly registered domain then you’ll need to log into cPanel to create an “Addon” domain. This is a simple process that takes less than a minute once you’re logged into cPanel.
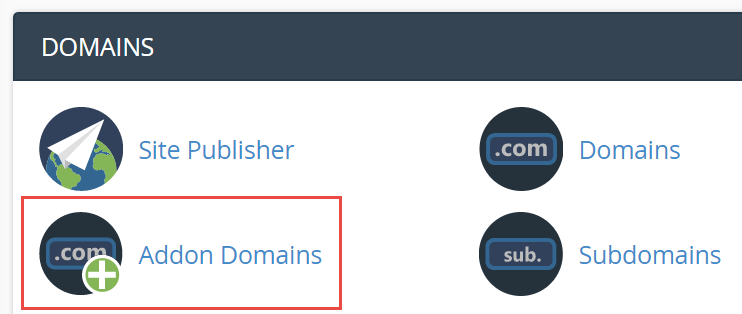
Locate and click the Addon Domains icon, press (ctrl + f) to search by text if you can’t find it, under the DOMAINS heading.
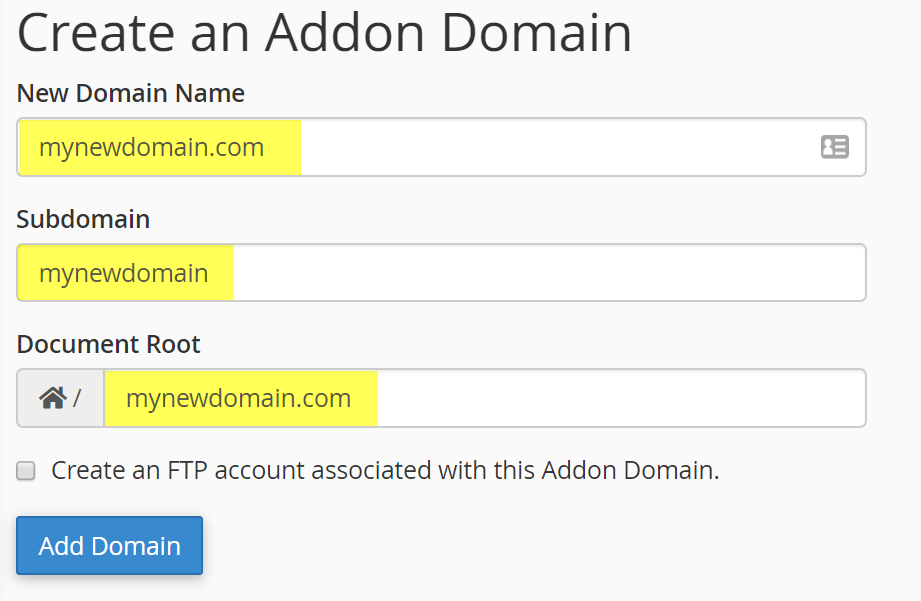
If you registered mynewdomain.com then you’ll enter mynewdomain.com into the New Domain Name field. After you click out of the New Domain Name box the subdomain and Document Root will auto-populate. Click the Add Domain button.

Now you’ve successfully created an Addon Domain in your existing cPanel (hosting) account. You will see the new domain name added at the bottom of the Addon Domains page.
3. Create a Subdomain in cPanel
If you’ve already created an “Addon” domain inside of cPanel you can also create subdomains. A subdomain can also be created on the primary domain of the hosting account. To create a subdomain it’s a similar process as creating an “Addon” domain. Let’s say we wanted to create a subdomain for a company billing portal and the subdomain is going to be billing.
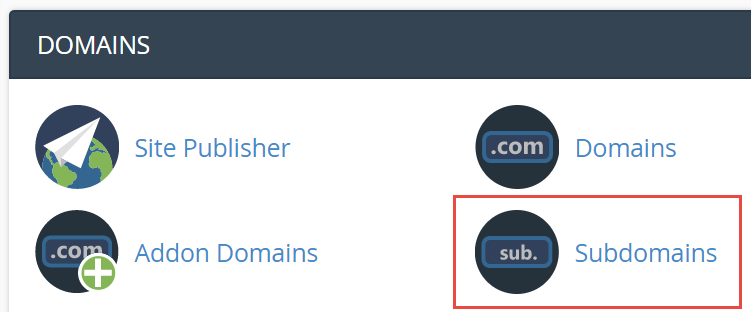
Locate and click the Subdomains icon, press (ctrl + f) to search by text if you can’t find it, under the DOMAINS heading.
If your primary domain on the account or “Addon” domain is mynewdomain.com then you’ll enter billing into the Subdomain field box. After you click out of the Subdomain box and select the Domain you wish to create the subdomain on, the Document Root will auto-populate. Click the Create button.
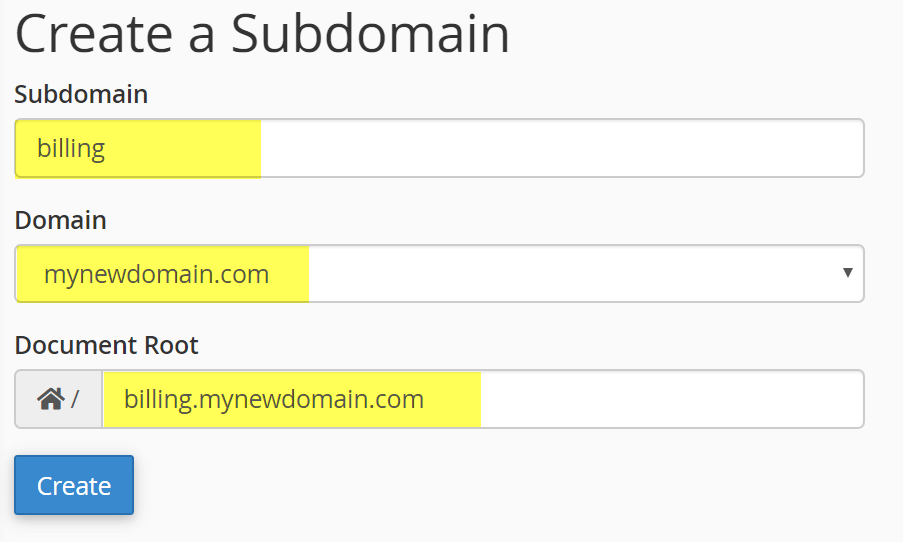

Now you’ve successfully created a subdomain on an existing domain in that’s hosted through your existing cPanel account. You will see the new subdomain name added at the bottom of the Subdomains page.
4. DNS Propagation
When you update the nameservers on a domain you’ll need to remember that the domain will need to go through what’s called DNS Propagation. DNS Propagation can take up to 72 hours on rare occasions. This means that you may not see the domain fully resolving to your hosting account’s server. Please be patient while DNS Propagation is taking place.


