
If you have email accounts managed through your web hosting provider or third-party provider such a G Suite it’s possible to migrate those emails from those email accounts when you change web hosting providers or decide to move off a third-party provider.
People use many different methods to backup, copy, or migrate emails from one account to another. For those of you using Outlook it’s possible to create an Outlook .pst file and restore that file inside of Outlook once you’ve connected to your new email provider (email server). Another popular method is to copy existing emails into another email account’s folder and then copying those emails back into the new email account hosted through your new email provider.
Continue reading to learn how to backup and restore email accounts using IMAPSize.
- Download IMAPSize
- Add the Old Email Account into IMAPSize
- Create a Backup of the Old Email Account
- Add the New Email into IMAPSize
- Restore Backup to New Email Account
1. Download IMAPSize
Another method is using a freeware Windows application called IMAPSize. IMAPSize allows you to connect to an email account, create a backup, and restore that backup to the new location. You’ll need to be on a Windows computer to use IMAPSize.
You can donwload the latest version of IMAPSize at the following URL – http://www.broobles.com/imapsize/download.php.
If you’re looking to backup emails from an email account you will need to make sure the server your email is hosted on supports IMAP connections. If that server does not support IMAP connections this process will not work.
2. Add the Old Email Account into IMAPSize
Once you’ve downloaded and installed IMAPSize you’ll need to open the program on your computer. The program will look like the picture below:
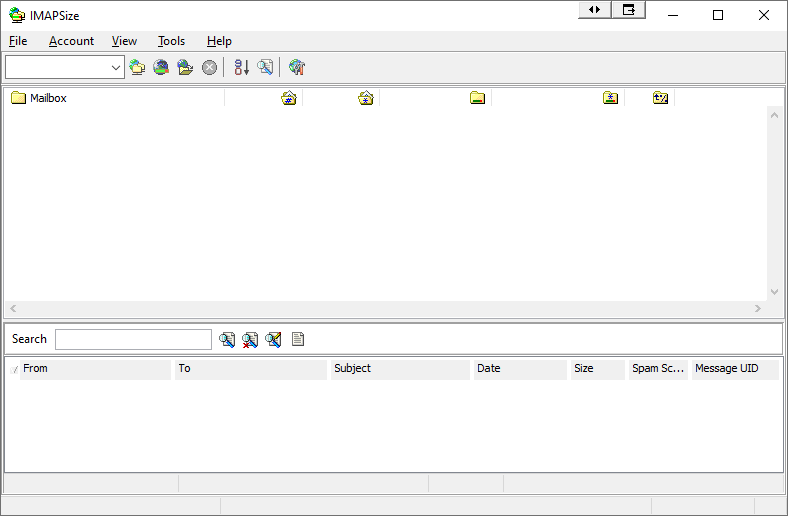
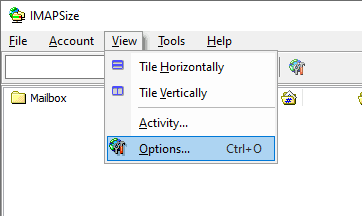
Click the View menu link and Options from the submenu. This will open a new popup where you’ll add an account to IMAPSize.
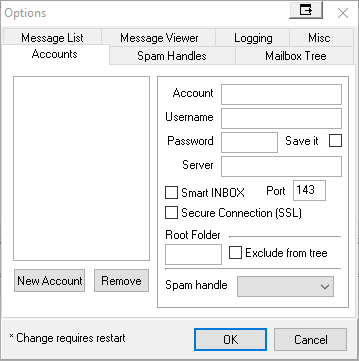
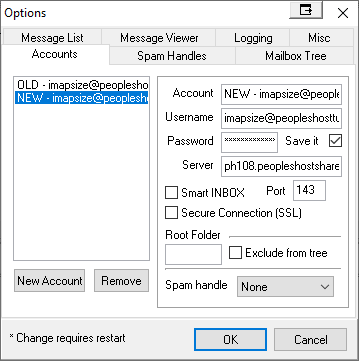
When you click the New Account button another popup will appear where you’ll enter details of the email server (server hostname or IP Address) and email account, email account password, and port. In the “Account” field, make sure to label the account with prefix “OLD – ” so you can identify it in later steps.
In this example, we’re moving emails in an email account hosted on one of our servers ph100.peopleshostshared.com whose IP Address is 66.103.159.6). You can use ph100.peopleshostshared.com, which is the server’s hostname or the IP Address 66.103.159.6 in the “Server” field. We’re going to use the hostname ph100.peopleshostshared.com.
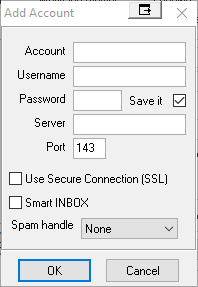
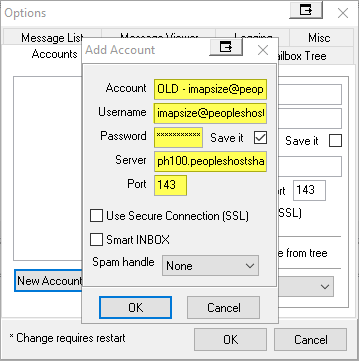
Click the OK button to add that account into IMAPSize. You’ll see that “OLD -” account listed in the drop down on the main IMAPSize window as shown below:
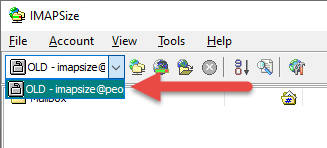
Now you can create a backup of that email account by following the next step.
3. Create a Backup of the Old Email Account
Select the “OLD -” account from the drop down. You’ll want to make sure you entered the correct email settings by testing the connection to that account. Click the icon with the folders and globe. If your connection was successful you’ll see items populate in the window.
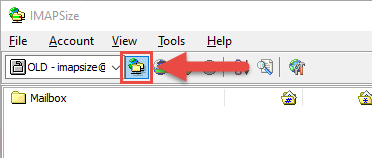
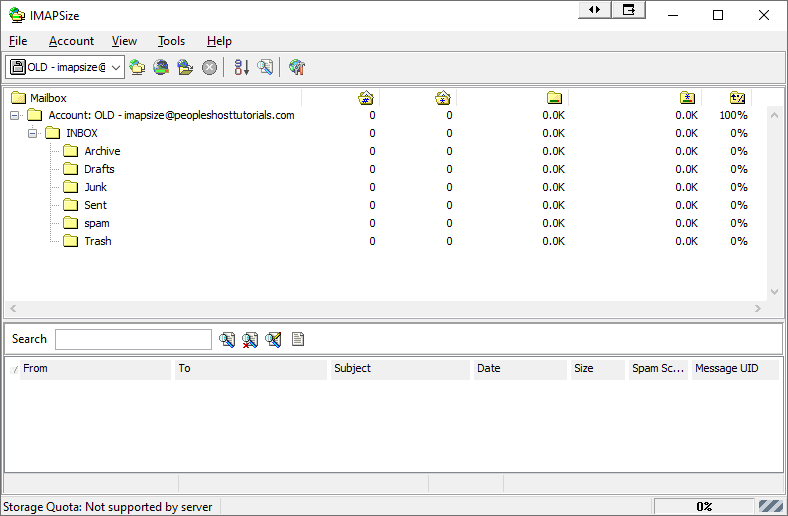
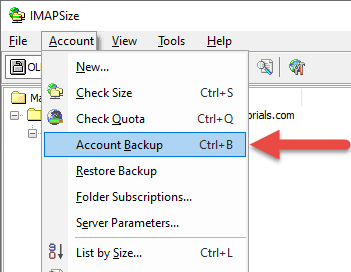
Click the Account tab and click Account Backup from the sub menu. A new window will appear. Make sure to Select All folders and then click the Backup button. If the email account you’re attempting to backup is large the backup process may take several minutes and even hours.
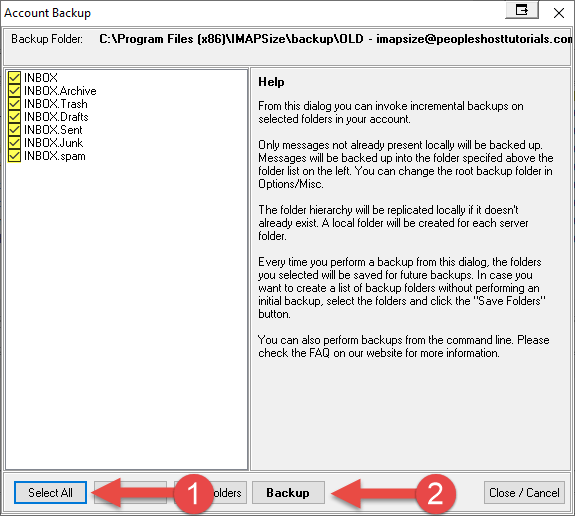
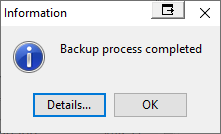
When the backup process is completed you’ll see a notification box appear letting you know the Backup process completed.
4. Add the New Email into IMAPSize
Now you’ll need to add the email account details that will connect to the new server (via IMAP) that your email is going to be hosted on. You’ll need to follow the same process as above to add a new account. This time, we’re going to use the “NEW -” prefix to label our account.
In this example, we’re moving the backed up emails to an email account hosted on another one of our servers ph108.peopleshostshared.com whose IP Address is 144.208.108.213). You can use ph108.peopleshostshared.com, which is the server’s hostname or the IP Address 144.208.108.213 in the “Server” field. We’re going to use the hostname ph108.peopleshostshared.com.
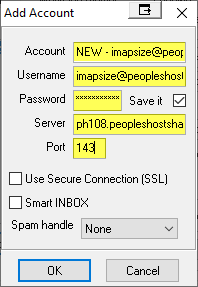
Now you’ll see both the “OLD -” and “NEW -” accounts in the list of accounts in IMAPSize. Click OK to go to the main IMAPSize screen.
5. Restore Backup to New Email Account
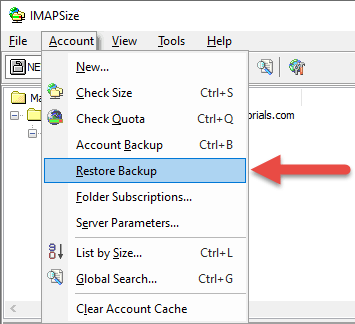
To restore the backup created from the previous step click the Account tab and click Restore Backup from the sub menu.
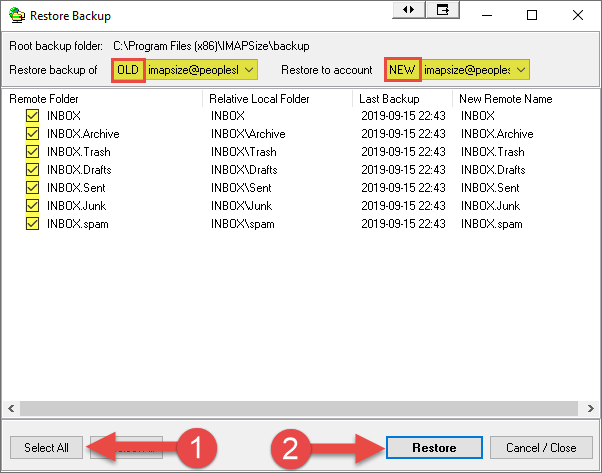
Make sure to select the “OLD -” email account for Restore backup of and the “NEW -” email account for Restore to account as shown below. Click the Select All button and Restore button to begin the restore process. Again, this may take several minutes and even hours depending on the size of the email account.
You’ll receive a warning that “You have chosen to restore backups to a different account. Are you sure?” click the OK button.

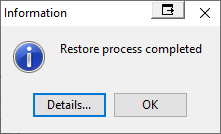
If the restore process completes successfully you’ll receive a message telling you Restore process completed.
Please note, that all of the emails will appear in the new inbox as new emails that arrived into the inbox on the date you restore those emails into the email account. You folder structures should be in tact as well.
If emails were not migrated successfully, folder structures were not retained, or emails are missing then you’ll need to attempt the migration process again.


