
Many of you are familiar with G Suite (formerly Google Apps). If you’re like millions of other individuals and businesses who have chosen to use G Suite for email, you’ll need to make sure you add the correct DNS records for your domain. After signing up for G Suite, Google will instruct you to add Mail Exchange (MX Records) in your domain’s DNS settings. Google’s MX Records are necessary so mail is prioritized correctly and you specify which mail server is responsible for accepting email messages from a particular domain.
If you are unfamiliar with DNS and why the MX Record values Google provides needs to be added, you can learn more about What is DNS? Nameservers, MX Records, and CNAME Records in another article published to our blog.
- What is G Suite?
- What are Google G Suite MX Records?
- How to Add G Suite MX Records in cPanel
- DNS Propagation
1. What is G Suite?
G Suite is Google’s productivity and collaboration platform. It allows you to connect a domain and use services such as Google Drive, Docs, Calendar, Email, Hangouts, and more with friends, family, and colleagues. All of these applications are hosted on the cloud and make it easy to share and collaborate with someone in real time.
When you sign up for G Suite you are connecting your domain name to their cloud based services (this includes email). This allows you the ability to create business email addresses while signing in and using Google’s friendly Gmail interface to access and manage your email. G Suite also allows you to create additional email accounts (30GB of space) for an additional $5/person/mo.
2. What are Google G Suite MX Records?
Google’s G Suite MX Record values will be required for email to work properly. The G Suite MX Records and priority for each record is below:
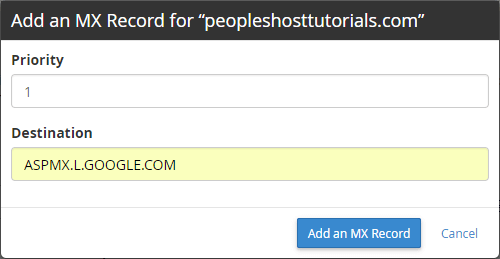
1 ASPMX.L.GOOGLE.COM
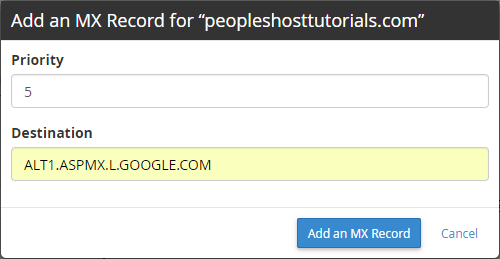
5 ALT1.ASPMX.L.GOOGLE.COM
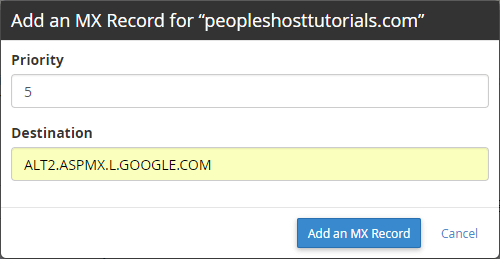
5 ALT2.ASPMX.L.GOOGLE.COM
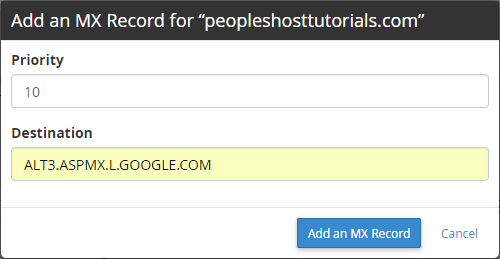
10 ALT3.ASPMX.L.GOOGLE.COM
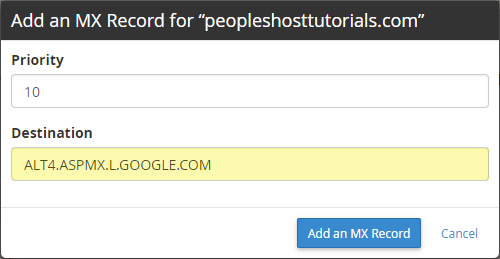
10 ALT4.ASPMX.L.GOOGLE.COM
3. How to Add G Suite MX Records in cPanel
Google will instruct you to add DNS records to your domain. More specifically, MX Record values to your domain’s DNS. If you’re a customer of ours, you’ll want to log into cPanel and follow the instructions below.
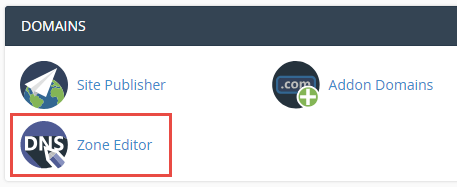
First, log into cPanel control panel and access the Zone Editor under the DOMAINS heading.
On the next page you’ll see your domain or list of domains if you have multiple domains added onto your cPanel account. Click the + MX Record button.

After clicking the + MX Record button, a popup will appear. In the popup you’ll enter the Priority and Destination. Repeat this step for each of the 5 MX Record values.
4. DNS Propagation
When the MX Records are updated on a domain, it can take up to 72 hours (on rare occasions) for new records to fully propagate across the Internet. If you plan on switching to G Suite for email you can avoid disruption with email by adding the MX Records prior to making the actual switch to G Suite.
If you’re pointing your domain to PeoplesHost nameservers you’re most likely using our mail server for email since we set a default MX Record for your domain. This default MX Record will have a priority 0. As long as this record is not deleted, email will be delivered and handled by our server since it has the lowest preference number of 0 (highest priority).
After adding the G Suite MX Records you’ll want to wait at least a day to remove the MX Record with priority 0 and test to see if incoming email arrives to your G Suite email inbox for that particular email account. If it does, then you know your domain’s MX Records have fully propagated and resolve to Google’s G Suite mail servers.


