Many website owners and online businesses rely on MailChimp for their email marketing, automated responses, and lead generation. MailChimp offers a free plan that offers you the ability to create campaigns, access to pre-made email templates, up to 2,000 total subscribers and 12,000 emails per month.
If you’re an existing MailChimp user or planning on setting up an account, you’ll also be required to verify your domain using a TXT record and CNAME record. The Domain Authentication process for MailChimp requires you to add these two records to your domain. This will entail logging into your web hosting control panel to access the DNS Zone Editor.
- Access Your MailChimp Account Settings
- Verify a Domain
- Domain Authentication
- How to Add CNAME & TXT Records
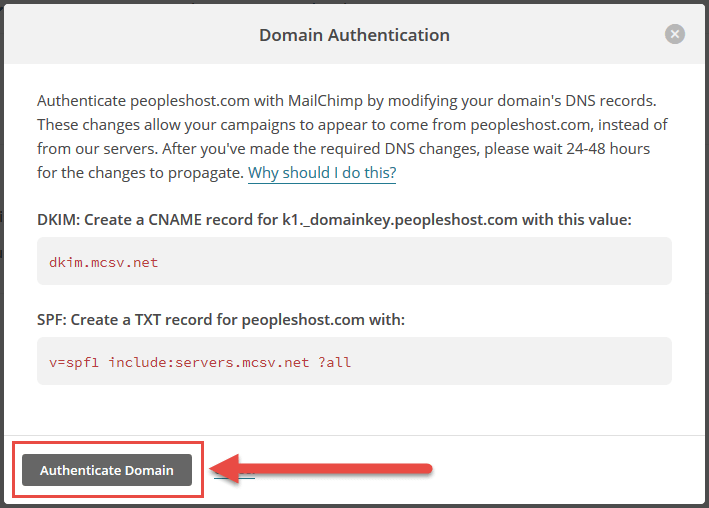
- Final step: Authenticate Domain
1. Access Your MailChimp Account Settings
After signing up and creating your MailChimp account, you’ll want to log into your dashboard. In the upper right corner you’ll see your name and an arrow that will activate a dropdown menu. In the drop down menu click the menu option for Account.

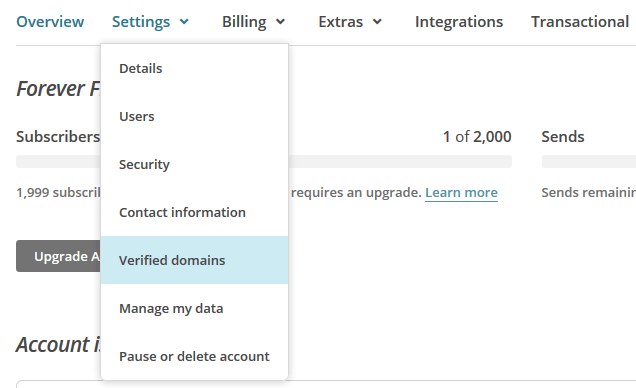
On the next page you’ll see a navigation bar with Settings in the middle of the page. In the Settings dropdown menu click Verified domains.
2. Verify A Domain
Before you can authenticate your domain with the MailChimp DNS zone records you’ll need to verify that you have access to an email address at the domain you plan to send campaign emails from. Click the Verify A Domain button on the Verified domains page and enter the email address that will be used (by default) in your campaigns.

Shortly after sending the verification email button you should receive an email to the address you entered. Inside of this email you will need to click a link to verify the domain.
3. Domain Authentication
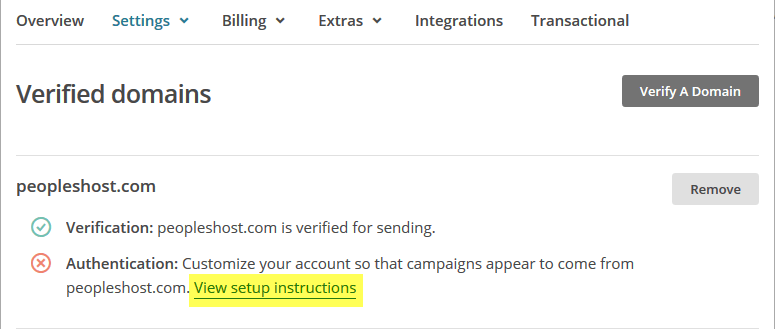
Now that your domain has been verified you can move onto the next step for domain authentication. On the same page from the previous step, you’ll want to click the View setup instructions link.
A popup will appear with a CNAME record and TXT record that you will be required to add to your domain’s DNS records. This allows you to send emails through your campaigns from your domain on the server it’s hosted from. You can read more as to why this is something you should do.
Here’s what you should see:
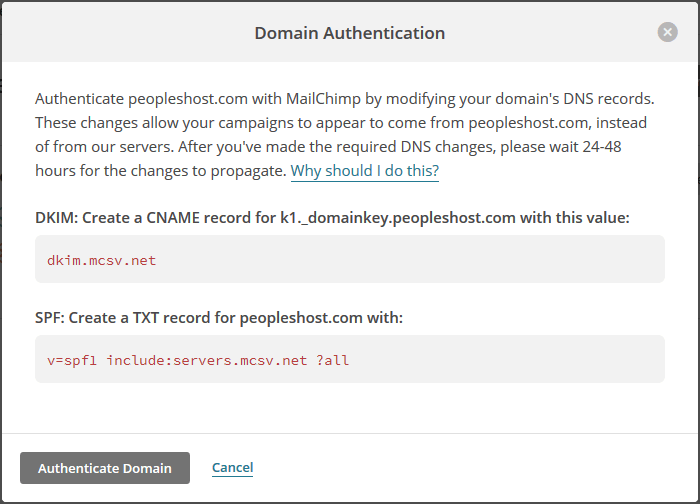
You’ll want to copy both the CNAME record and TXT record and paste them into a text document for later use.
See below examples (yours may be different):
DKIM: Create a CNAME record for k1._domainkey.peopleshost.com with this value:
dkim.mcsv.net
SPF: Create a TXT record for yourdomain.com with:
v=spf1 include:servers.mcsv.net ?all
4. How to Add CNAME & TXT Records
In this walkthrough, we’re going to show you how to add the MailChimp CNAME record and TXT record inside of cPanel control panel. If you do not have access to cPanel or your web hosting account’s zone editor you’ll need to submit a request to your web host to add these records for you.
First, you’ll want to log into cPanel and locate the DOMAINS heading. Click the Zone Editor icon under that heading.
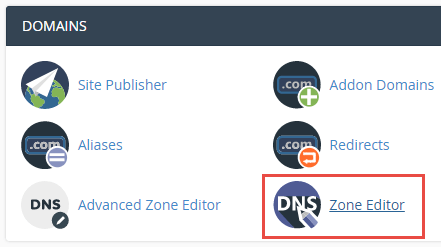
Once you’re inside the Zone Editor, you’ll want to click the blue button for + Add Record. In the dropdown, select Add CNAME Record.

Enter the CNAME record you retrieved from MailChimp’s dashboard in the previous step. In this example, we’ll be adding k1._domainkey into the Name field.

Next, you’ll add the TXT (SPF) record by clicking the + Add Record again. This time, select the Add TXT Record.

Enter the TXT (SPF) record you retrieved from MailChimp’s dashboard. The purpose of a TXT (SPF) record is to prevent spammers from sending emails from email addresses set up on your domain.

5. Authenticate Domain
When you have completed the task of adding the DNS records to your domain you should be able to authenticate your domain inside of the MailChimp dashboard.
To authenticate your domain, navigate back to the Settings > Verified domains page inside of MailChimp and click the View setup instructions again.
Inside of the popup that appears click the Authenticate Domain button.
