Earlier this year (2017), SSL Certificates and securing your website was the center of attention. A lot of talk was, and still is, surrounding this topic because major search engines have announced that having a secure site is one of the many ranking factors now used to determine a site’s organic search results. Popular web browsers are also more prominently displaying red text or padlocks for non-secure sites in the browser’s address bar. Definitely not good for your visitors!
Previously, we published a blog post on how to secure your website with an SSL Certificate. If you do not know what an SSL Certificate is, you’ll want to read this article to understand and learn more before reading on.
What To Do AFTER Adding An SSL Certificate?
Adding an SSL Certificate does not magically make your site secure. There’s still work that needs to be done after an SSL Certificate has been set up and installed on the server for your domain. This can be time consuming and frustrating when you can’t figure out why the green padlock isn’t showing up in your browser’s address bar.
Here is a checklist of items you’ll want to go through to make sure elements on your website’s pages, posts, product listings, etc. get updated from http to https:
- Update CloudFlare from Flexible to Full
- Search & Replace Database Tables
- Manually Update Hardcoded URLs
- Manually Update Scripts, Codes, Links
- Force HTTPS with .htaccess Rule
- Update Google Analytics Property & View Settings
- SSL Checker Tool
1. Update CloudFlare from Flexible to Full
If you are not using CloudFlare please advanced to step #2. If your domain is pointing to CloudFlare follow these instructions.
By default, CloudFlare will have your Crypto (SSL) set to Flexible. If you secure your site with an SSL Certificate you will need to make sure to update that setting to Full. Otherwise, your site will not load properly. Please follow the instructions in our CloudFlare post in the section labeled SSL (Secure Socket Layer) Configuration.
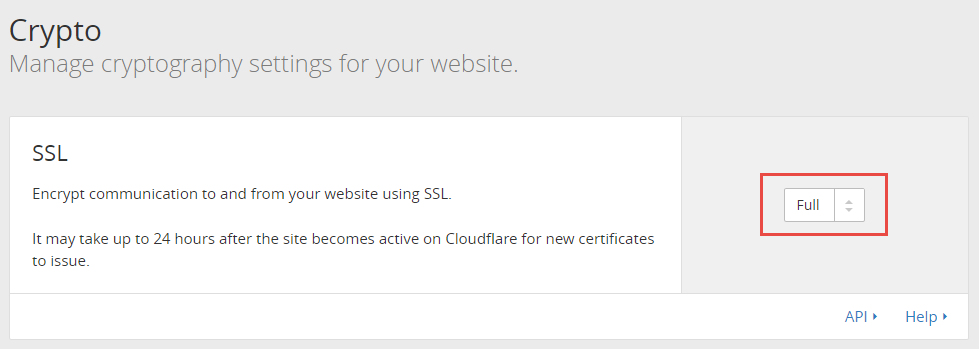
In short, you’ll want to log into your CloudFlare account and navigate to the Crypto settings. Simply update your SSL setting from Flexible to Full and save those settings.
2. Search & Replace Database Tables
Now that an SSL Certificate is installed on your site, you will need to make sure your site’s non-secure (http) URLs are updated to secure (https). Your website’s database tables is where (mostly) everything relating to your website is stored. For example, the information a user submits to register to your website will be stored in a database table allowing you to access or manage that information at a later date.
Your website’s pages and posts also store data in certain tables of your database. You’ll need to make sure to search and replace any non-secure URL for your domain with the secure version of your domain’s URL. We’ll walk you through two steps on how to achieve this.
1. Export Database – Search & Replace Text
To begin, you’ll want to export your website’s database. You can accomplish this by logging into cPanel and locating phpMyAdmin under the Databases heading.
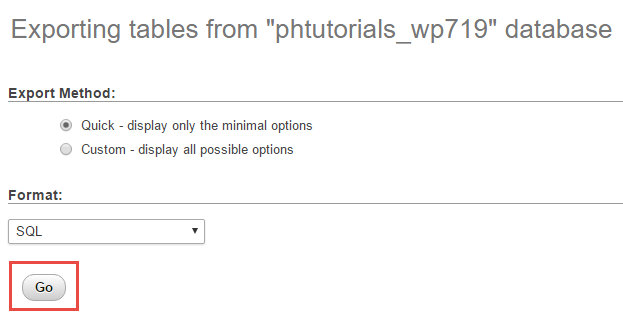
A new tab will open phpMyAdmin in your browser. Select your database from the left navigation and click the Export tab in the main heading/navigation.

Click the Go button to export your website’s database and save the .sql file locally onto your computer or device.
Next, you’ll want to open that database with a text editor. Do not, I repeat DO NOT use Microsoft Word or any other Word application or program. Those programs tend to add invisible characters and spaces. We prefer using Notepad++ but you can use your computer’s default text editor; Notepad.
Right click the .sql file you just exported and click Edit with Notepad.


Pay close attention to whether or not your domain currently has the www. prefix. If it does not, you do not want to run a replace all and add the www. prefix. You will want to run a replace all so that http://yourdomain.com is replaced with https://yourdomain.com.
2. WordPress Users – Search & Replace Plugin
For those of you who use WordPress you can easily run a search and replace on your database tables by using a plugin. We recommend using the plugin Better Search Replace by Delicious Brains.
After installing and activating the plugin, you’ll be able to access the settings by navigating to Tools > Better Search Replace. Make sure to select all tables and UNCHECK Run as a dry run? when you are certain that you want the plugin to run and make changes.

The Better Search Replace plugin runs fairly quickly. You’ll see the success message at the top of the page and how many rows were affected when it completes its run.
3. Manually Update Hardcoded URLs
Updating your database tables won’t update everything you need from http to https. Stylesheets (.css), JavaScript (.js), and other theme (.php) files may still contain hardcoded links with non-secure http appended to them.
An easy way to check and see what may need to be updated is by running https://www.whynopadlock.com on your domain.
If there are no hardcoded URLs in any files and no insecure elements on the URL you checked, it should look something like below. Meaning, a visitor can access that particular URL (you just checked) and they will see a green padlock in the browser’s address bar.

4. Force HTTPS with .htaccess Rule
Now, you’ll need to make sure that visitors accessing your site will reach the secure version. If you don’t set a rule in the .htaccess to force HTTPS visitors will be able to access both the secure and non-secure version of the URL. You can read more about 301 Redirects Code Examples if you are unfamiliar with those.
Chances are, you’re website is likely being hosted on an Apache based web server, which means you’ll need to add the following code in your .htaccess file:
RewriteEngine On
RewriteCond %{HTTPS} off
RewriteRule ^(.*)$ https://%{HTTP_HOST}%{REQUEST_URI} [L,R=301]
If you’re website is hosted on an nginx web server, you’ll want to add the following to your Nginx config file as a new server block:
server {
listen 80;
server_name yourdomain.com www.yourdomain.com;
return 301 https://yourdomain.com$request_uri;
}
5. Manually Update Scripts, Codes, Links
After updating your database tables and any files with hardcoded non-secure URLs of your domain, you’ll want to update any tracking codes, third-party tracking codes or scripts, and links to other sites. We have observed that many website owners place non-secure (http) tracking codes, scripts, or links to other sites in their headers, footers, and sidebar widgets.
If you checked out Why No Padlock, this will also tell you what needs to be updated from http to https on any page you use it to check with.
6. Update Google Analytics Property & View Settings
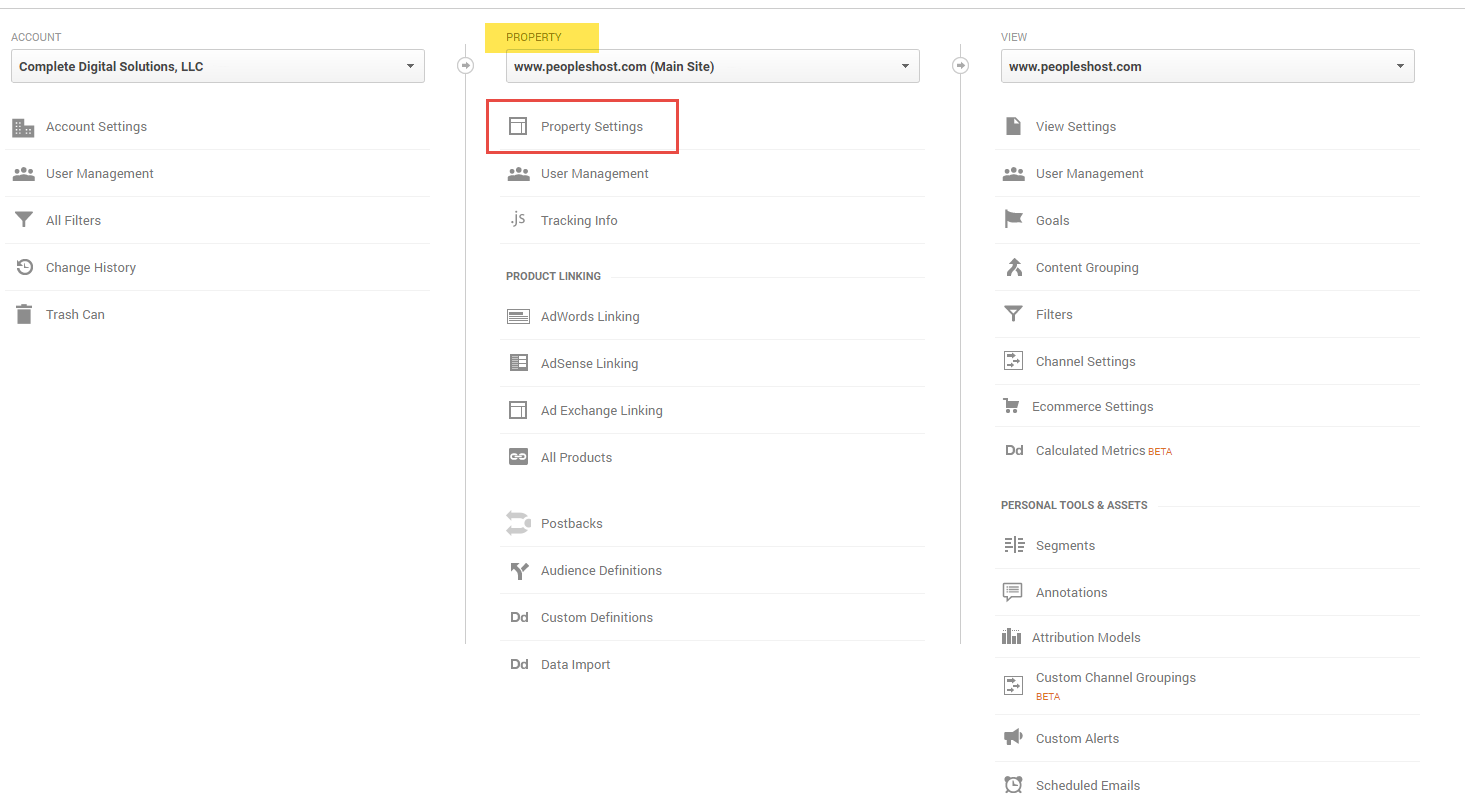
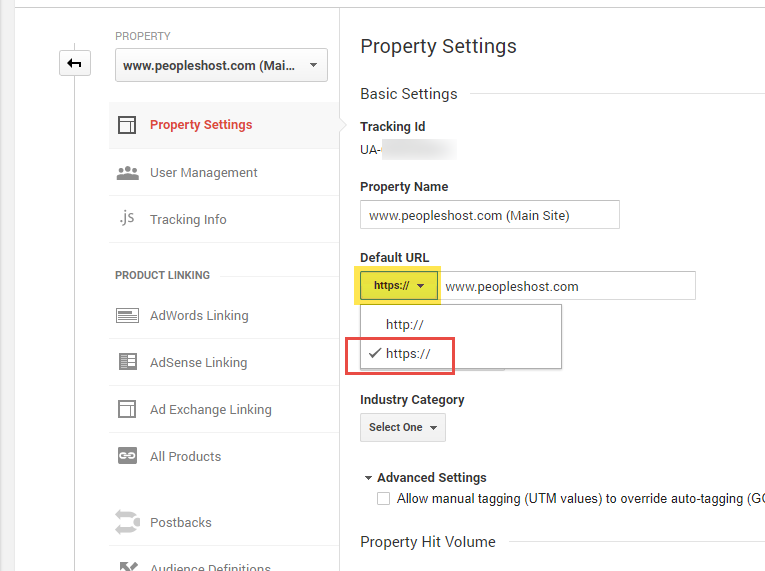
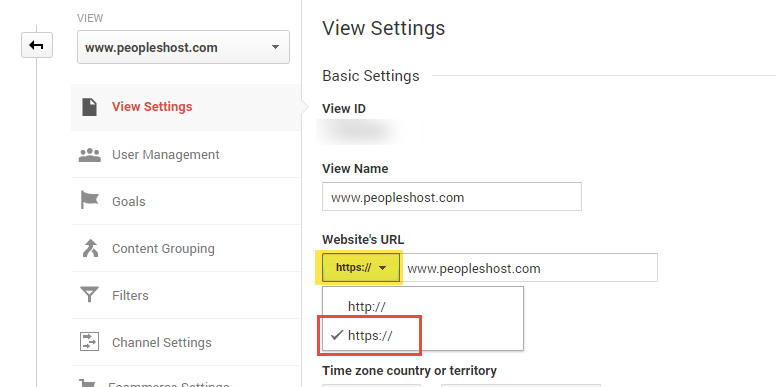
If you have Google Analytics tracking setup on your website, you’ll need to make sure to log into your Google account and update the Property and View settings to the https version of your site.
To update the Property and View settings follow these instructions:
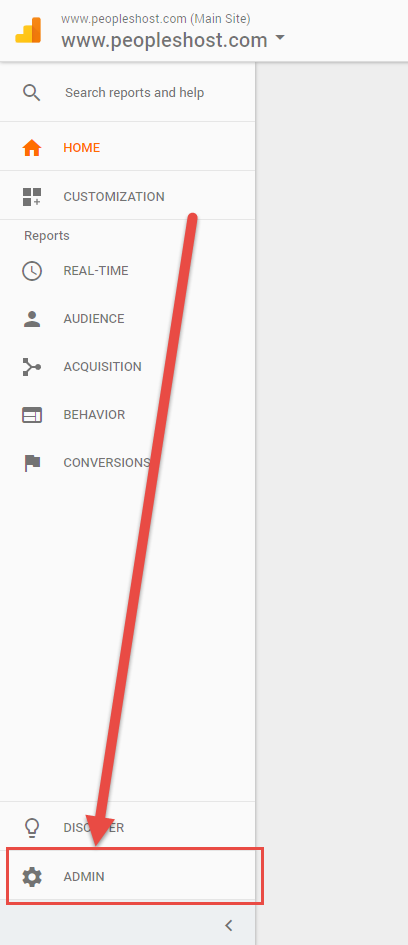
- Log into Google Analytics and click the Admin link in the bottom left
- Click on Property Settings to update the Default URL from http:// to https://
- Click back and go to View Settings to update the Website’s URL from http:// to https://

7. SSL Checker Tool
To check and see if your SSL Certificate was setup and installed properly on the server, you can use the SSL Checker from SSL Shopper. Go to https://www.sslshopper.com/ssl-checker.html. This tool will tell you what IP your domain is resolving to and whether or not the SSL Certificate is active and setup and installed properly.
If your SSL Certificate was installed correctly, you should see green checkmarks all the way down. Such as this checker on Google’s homepage.

Securing your website with an SSL Certificate and updating your website from http to https can be a time consuming process. With a little patience and using the tools mentioned above, you should have your site fully secured in a timely manner.


