There may come a time when you’re looking to migrate or transfer your website to another web hosting provider. WordPress is the most widely used CMS (Content Management System) in the world. Over half of our customers who migrate and transfer their websites from another web host are using WordPress.
Many web hosts, including PeoplesHost, will migrate a certain amount of sites for new customers for no additional cost. However, if you find yourself in a situation where you’re looking to migrate your website manually then you’ll want to follow along. In this post we’re going to walk you through a step by step guide on how to manually migrate your WordPress site from one host to another. The process outlined below can be used for any website with a few minor differences.
- Backup Your Website’s Files
- Export Your Website’s Database(s) in phpMyAdmin
- Create an Addon Domain in cPanel
- Create and Import Your MySQL Database in phpMyAdmin
- Upload Your Website’s Files in File Manager
- Update WordPress wp-config.php
Backup Your Website’s Files
It’s very likely that your current web hosting provider has a control panel. If you’re running a WordPress site, it’s also very likely that you have access to a control panel (cPanel) to manage your website’s hosting account.
Before migrating your WordPress site over to another host, you’ll want to log into your control panel at your current web host and backup your website’s files. In this step by step guide we’re going to walk you through the steps to do this inside of cPanel, which is one of the most widely used control panels for Linux hosting environments.
First, you’ll want to log into cPanel with the credentials your web host has provided you. If you do not have these details you will need to contact support to obtain your login credentials. Once you’re logged into cPanel, you’ll want to find the Files heading and click the File Manager icon.
Note: We’re going to walk you through the steps on how to manually package your public_html (website’s files) inside of File Manager because some web hosts disable the automated backup wizard.
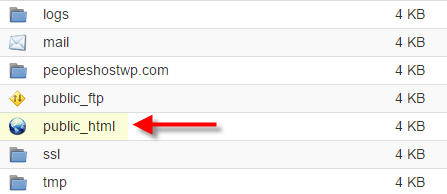
Double click through to your site’s public_html.
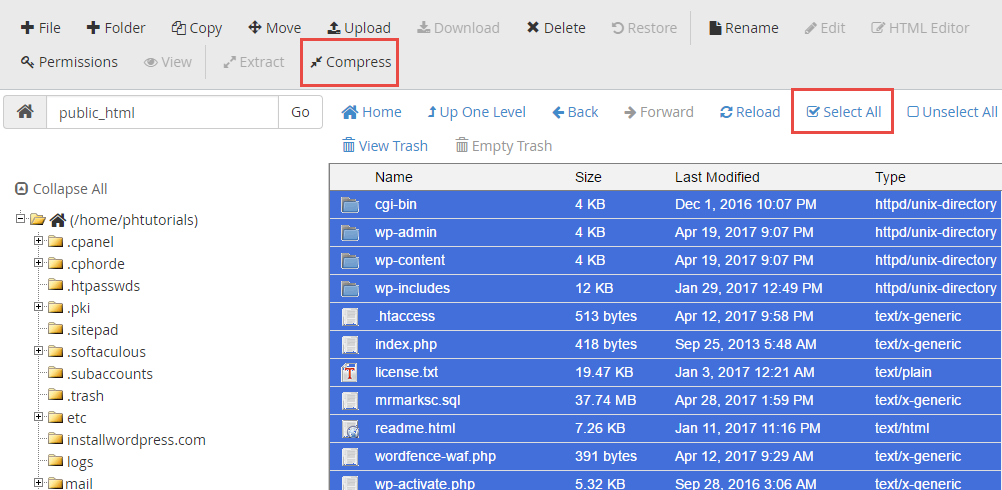
Next, you’ll want to click the Select All button to select all of your site’s files. After clicking the Select All button, you’ll want to click the Compress button. This will package all of the selected files and directories (folders) into a .zip file.
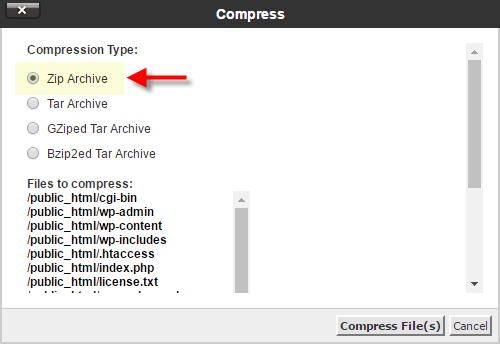
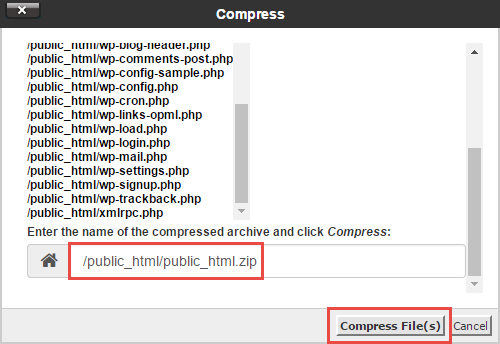
A Compress popup will appear. Choose Zip Archive (or any other Compression Type if you prefer another) and click the Compress File(s) button. Scroll down in the pop up and name your compressed archive (.zip). This can be whatever name you’d like, but in this example we’re going to name ours public_html.zip.
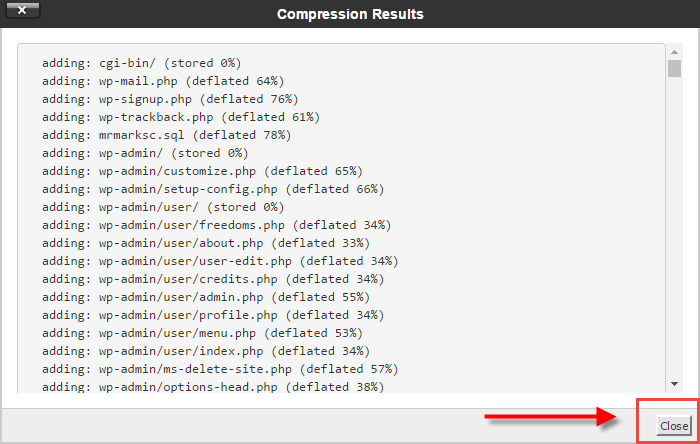
Once the .zip has been completed, you’ll see a screen that shows you the Compression Results. Click the close button to return to the public_html directory.
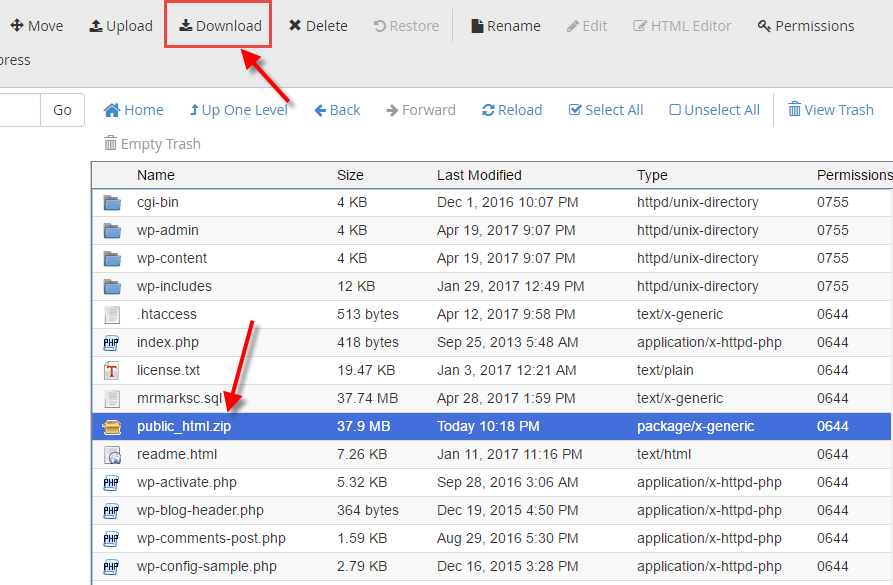
You should now see a .zip package sitting in your public_html. If you do not name your .zip in the Compress step above, it will have the same name as the first file/directory in your File Manager. In this example, we named ours public_html.zip.
Select the public_html.zip and click the Download button located at the top of the page. You’ll want to save this .zip file locally to your computer. We’ll be accessing this .zip file later in the guide to upload it to your new web host.
After backing up your website’s files, you’ll want to backup/export your MySQL database. Follow the steps below to learn how to export your website’s database in phpMyAdmin.
Export Your Website’s Database(s) in phpMyAdmin
To backup your website’s database by exporting it from phpMyAdmin, you’ll want to follow the steps below. You should still be logged into your control panel where you’ll search for the DATABASES heading and click the phpMyAdmin icon. This will load a new page and take you inside of phpMyAdmin.
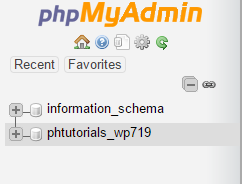
Inside of phpMyAdmin you’ll see a list of your databases on the left. In this example, there’s only one database present – phtutorials_wp719. Select your site’s database and it will expand.
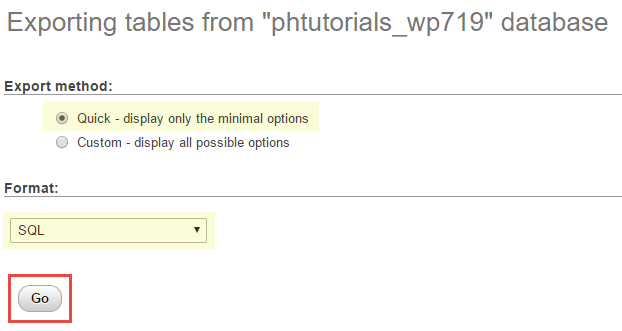
After you’ve selected your database, click the Export button at the top of the page. A new page will load asking you for (see below) and click Go. When the Go button is clicked you’ll be asked to save the SQL file to your computer. We recommend saving it to the same folder you saved your .zip file from the previous step.
- Export Method: Quick – display only the minimal options
- Format: SQL

Create an Addon Domain in cPanel
Now that you’ve backed up your website’s files and database, you’ll want to access your control panel at your new web host. Again, in this step by step guide on how to migrate your website, we’re walking you through the steps while using cPanel control panel.
In this step, we’re assuming you’re a PeoplesHost customer or have a hosting account set up at your new web host.
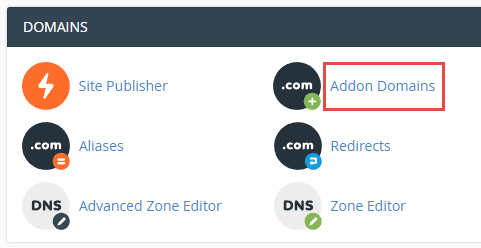
Log into your new cPanel (control panel) account and locate the header for DOMAINS. Under that header you’ll want to click the Addon Domains icon.
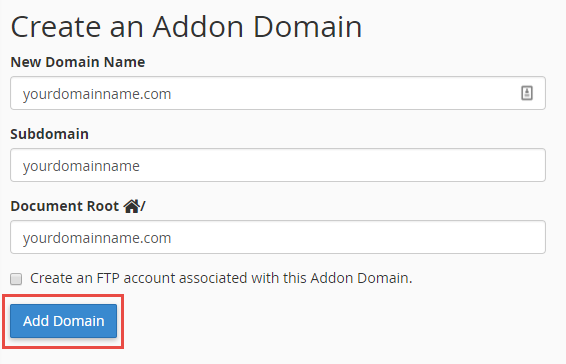
On the next page you’ll Create an Addon Domain. Fill in the first field box for New Domain Name, which is the URL for your website. The subdomain and Document Root should auto-fill/populate once you click out of the New Domain Name field box. Click the Add Domain button.
NOTE: There will be a notification that says That is not a valid domain. until you have typed the full domain name in that field box.
In this example, we’re adding yourdomainname.com. After you click the Addon Domain button, you should see a message that says “The addon domain “yourdomainname.com” has been created.”

You have now successfully created an Addon Domain in your new hosting account.
Create and Import Your MySQL Database in phpMyAdmin
In the previous step, you exported your website’s database from phpMyAdmin. Now, you’ll want to import that same database into phpMyAdmin on your new hosting account. Before you can import your database inside of phpMyAdmin, you’ll need to first create your MySQL database inside of cPanel and assign a database user to your website’s database.
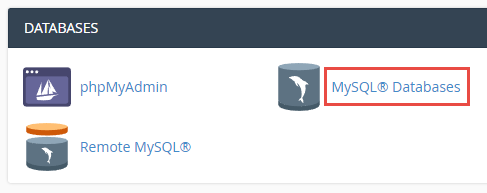
To create a MySQL database, locate the DATABASES section and click the MySQL Databases icon.
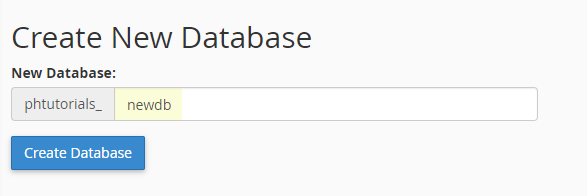
On the next page, you’ll create the name of your database. Your database name can be anything you’d like. In this example, we’re going to name our database newdb. Click the Create Database button when you’ve named your new database. You should receive a message that says Added the database “phtutorials_newdb”. Click the link to Go Back to the previous page.
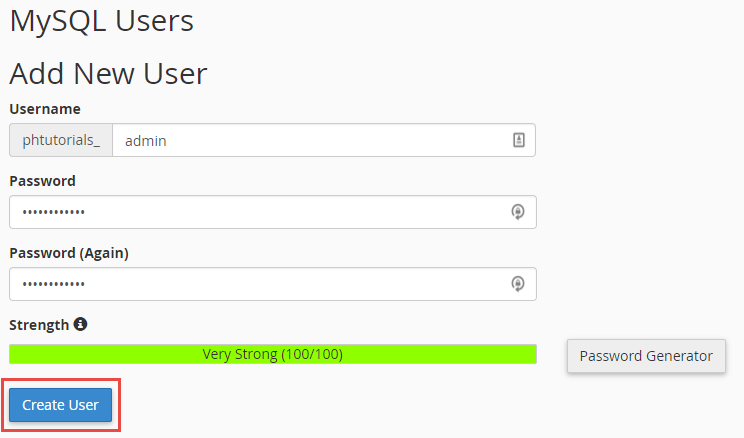
Next, you’ll need to create a database user for your website’s database that you just created. Scroll down on the page and locate the section for MySQL Users > Add New User.
In this example, we’re going to create a user admin. You can name your database user anything you’d like. Choose a password for this database user. Save this information since you’ll be updating your website’s configuration file later down the road.
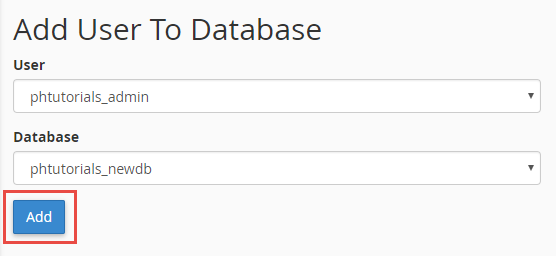
Now, you’ll Add that new database user to the database you created above. Scroll back down on the page and locate the Add User to Database section. Select your User and Database and click the Add button.
Next, you’ll Manage User Privileges. Select the box for ALL PRIVILEGES and click the Make Changes button at the bottom of the page. You’ll see a green notification that says “You saved “phtutorials_admin”‘s privileges on the database “phtutorials_newdb”.

After creating your database and database user, you’ll need to import your database into phpMyAdmin. This is the database you saved from your other web host in the previous step.
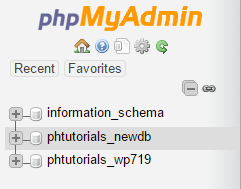
Log into cPanel and located the phpMyAdmin icon in under the DATABASES heading. This will open a new tab and will take you inside of phpMyAdmin. You should now see the new database you created (in our example it’s phtutorials_newdb) in the left hand side of the window.
Select your new database by clicking the name and it will appear to be highlighted. The page will load and show a warning that says No tables found in database. Disregard this notice since we’ll be importing your saved database into phpMyAdmin.
On the next page, click the Import button at the top of the page. A new page will load asking you to choose the file to import. Click the Choose File button. A window will appear and you’ll want to choose your database that you saved to your computer in the previous step.
After you browse your computer and select your database file (.sql), scroll to the bottom of the page and click the Go button.

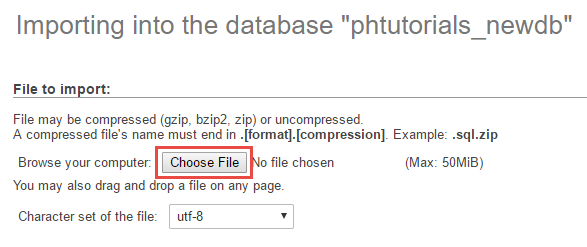
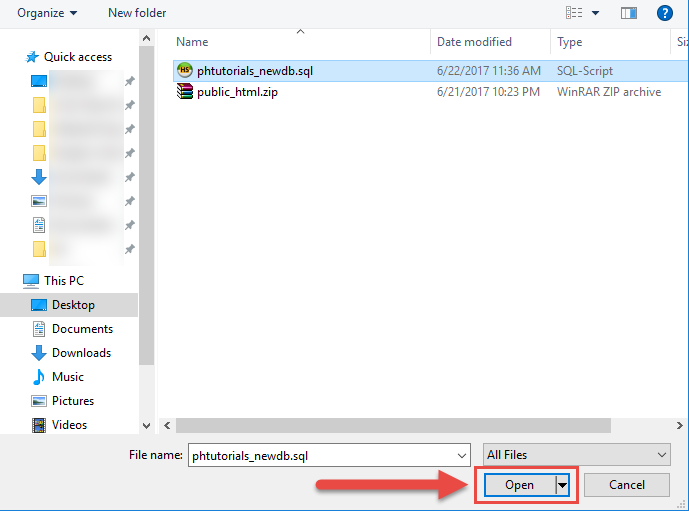
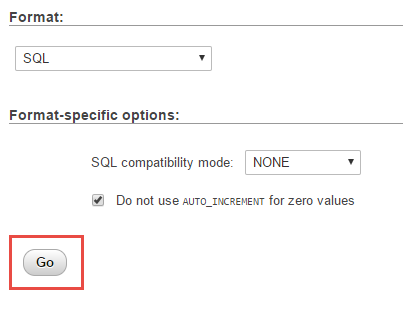
You should now see a message that says the import was successfully finished.

Upload Your Website’s Files in File Manager
Now that your database has been created and imported into your hosting account, you’ll need to upload your website’s files. Navigate back to cPanel and click the File Manager icon under the FILES heading.
When you created your Addon Domain, the Document Root was defined automatically. You may see your addon domain’s directory sitting outside of the public_html or inside of the public_html. In this example, the addon domain’s directory (Document Root) is sitting outside of the public_html.
Double click this directory and the page will reload into your new addon domain’s directory. By default, this directory will be empty. If you see a cgi-bin directory, you can delete it.
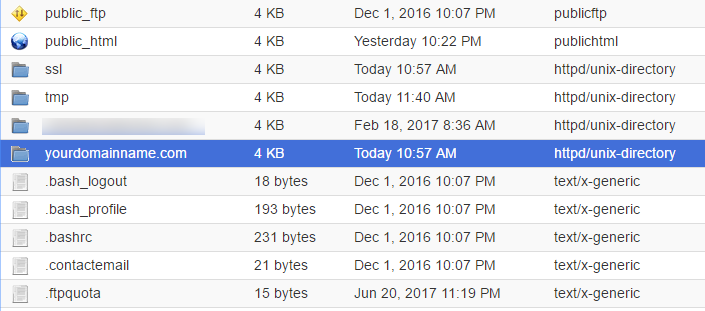
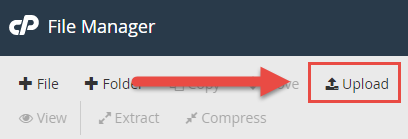
Now that you’re in your domain’s directory, you’ll want to click the Upload link at the top of the page. This will load another tab in your browser and ask you to select the file you wish to upload.
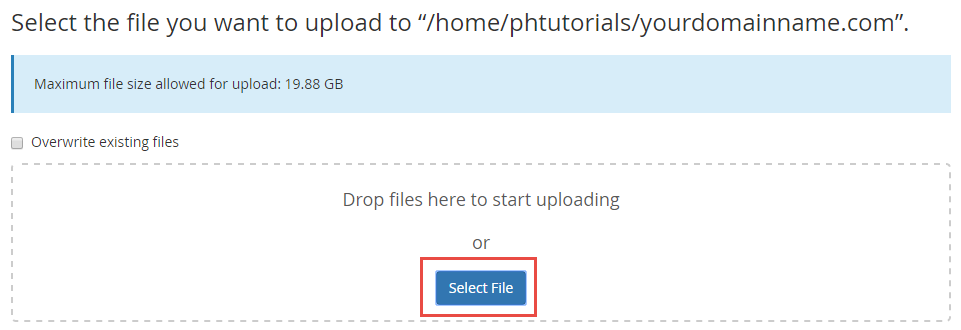
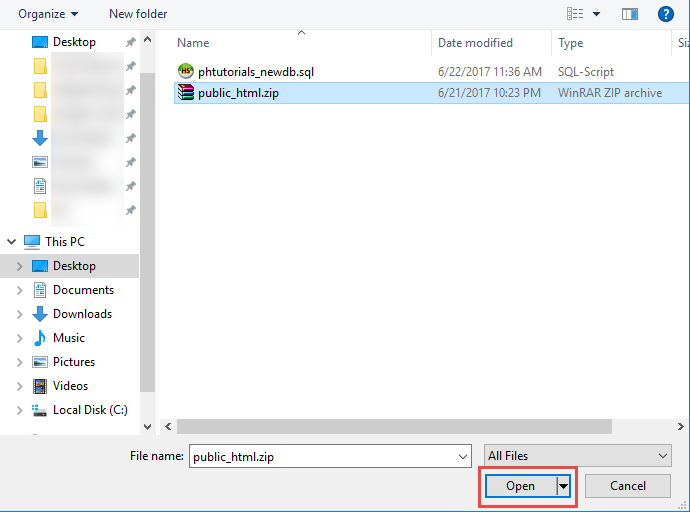
Click the Select File button. A window will appear asking you to choose the file to upload. Choose the .zip you created and saved in the previous step. Once you click Open, it will begin to upload that .zip file to your account.
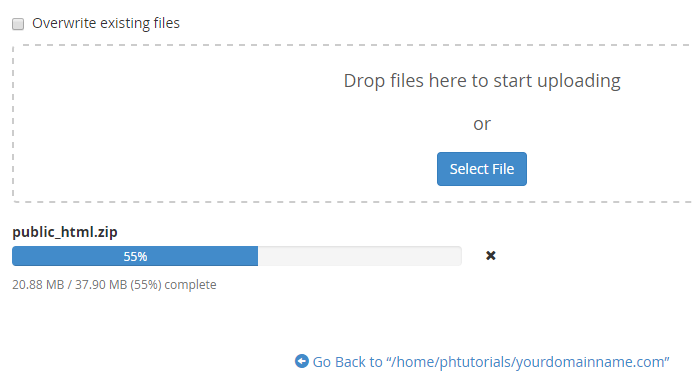
After the upload has completed, click the Go Back button at the bottom of the page.
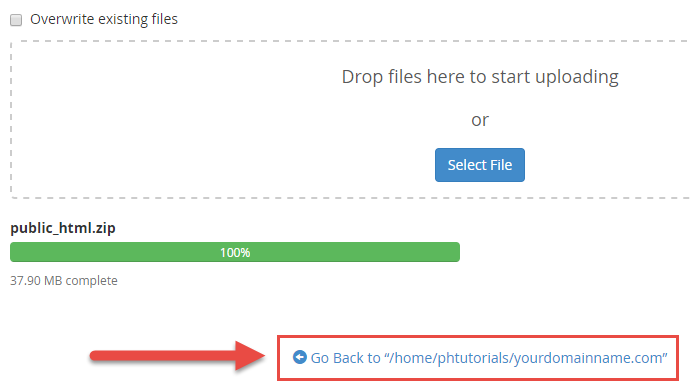
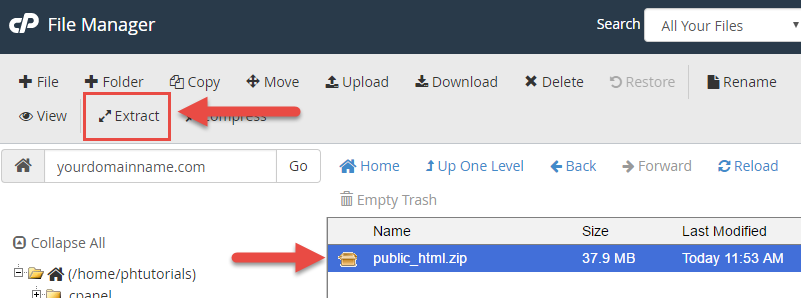
Now that you’ve uploaded your website’s files in a .zip package, you’ll need to extract the contents of that .zip into your account. You should see the public_html.zip sitting in your domain’s directory inside of File Manager.
Select the .zip file (it will appear to be highlighted) and click the Extract button at the top of the page.
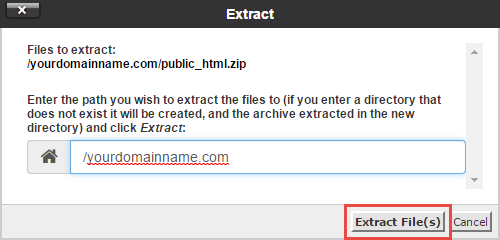
Once the files have been extracted you will see them appear inside of File Manager. You can now delete the .zip file that’s also sitting in the directory.
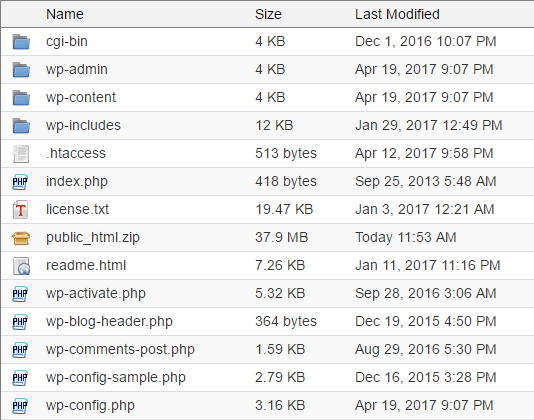
You’ve successfully extracted your website’s files inside of your domain’s directory.
Update WordPress wp-config.php
In this step by step guide we’re assuming you have a website running off of WordPress. This means that you’ll need to update your website’s wp-config.php with the new database name, database user, and password you created in the previous step.
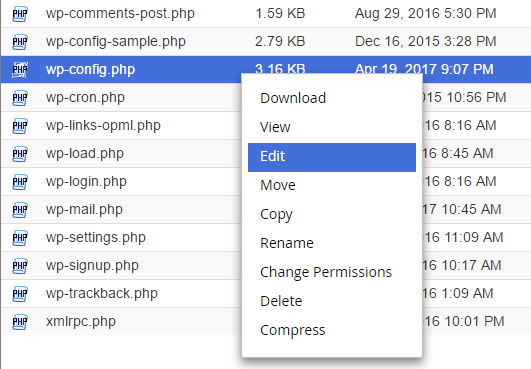
To update your database connection string, you’ll need to stay inside of File Manager and locate your wp-config.php file. Right click the wp-config.php and click the Edit option from the menu.
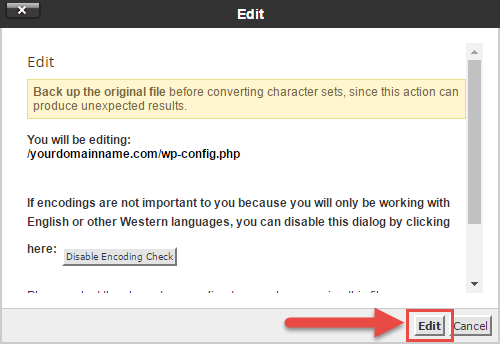
Inside of the wp-config.php you’ll see lines of code. This is where your MySQL settings are located. To update your WordPress database connection settings, you’ll want to locate the MySQL Settings section. In the screenshot below you’ll see the old database information.

Update your DB_NAME, DB_USER, and DB_PASS to the database name, user, and password you created in the previous step and click the Save Changes in the upper right corner of the page.

After updating your wp-config.php with your new database name, database user, and password you’ll want to be sure to update your domain’s nameservers to point to your new web host’s nameservers.
If you are an existing customer or new customer migrating to PeoplesHost and encounter any issues, don’t hesitate to reach out to our support team.


