Back in November (2016) we wrote an article on how to edit your hosts file on your Windows computer. In that article we covered a few things such as what a hosts file is and why you should make changes to your computer’s hosts file.
For those of you who haven’t read that article, a hosts file is a file on your computer that allows you to map hostsnames to IP addresses. In simpler terms, it can give you the capability to test a website on a new IP before updating the DNS on that domain. For example, we use this process and prefer it over temporary URLs here at PeoplesHost for testing purposes when migrating new customers over to our environments. This allows us to test the website after it has been migrated to make sure there are no errors and the website is displaying properly.
HOW TO CHANGE THE HOSTS FILE ON A MAC COMPUTER
Changing the hosts file on a MAC computer is a fairly straightforward process for anyone that has used Terminal (or any other similar command line application or tool). If you haven’t used Terminal before this process will be new to you, but don’t be afraid because this tutorial is beginner friendly.
Follow these steps to edit your hosts file:
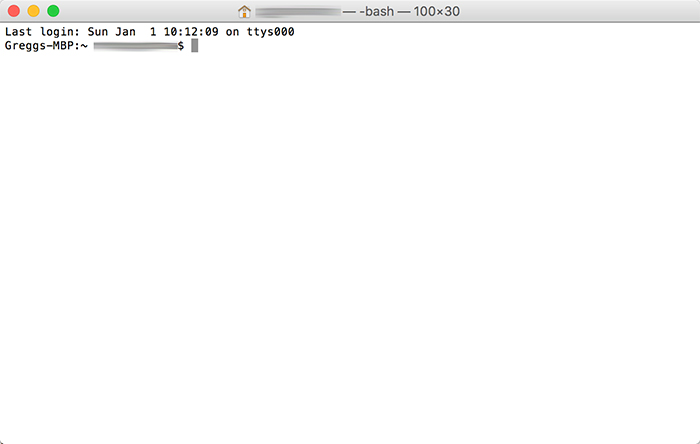
- Open Terminal by pressing CTRL + Spacebar or open the Spotlight search and search for “Terminal“
- Press the Enter key on your keyboard to open Terminal
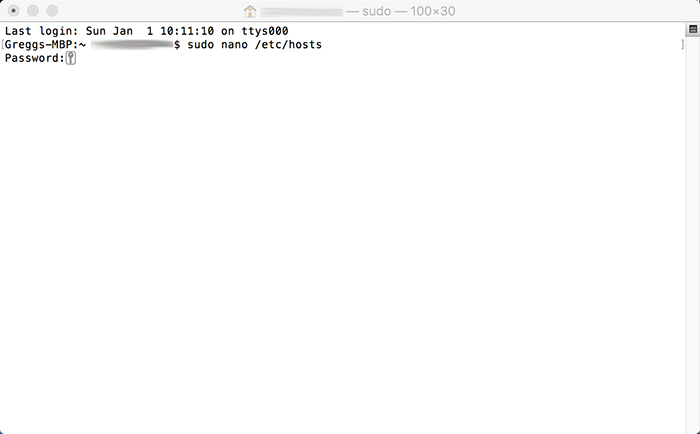
- Type sudo nano /etc/hosts
- Type in the Password to your computer (it won’t show the text in Terminal, but the text is actually being entered). Once you have typed your Password press the Enter key
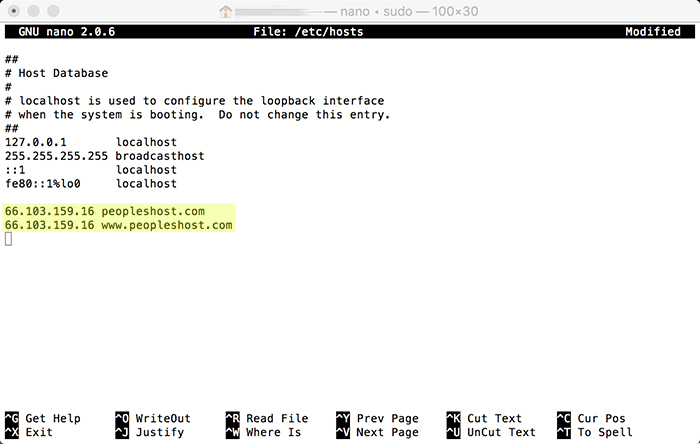
- Press the DOWN arrow key to get to the bottom of the hosts file
- Add your Shared IP along with your domain to the hosts file
- Hold the CONTROL button and press the letter O (CTRL + O) and press ENTER
- Hold the CONTROL button on your keyboard and press the letter X (CTRL + X)


If you have any questions about this process don’t hesitate to reach out to support.


