
In this post we will show you how to create your Google Analytics account. Setting up web analytics on your website is something you should not overlook. Why? As a business owner or marketer it’s paramount to gain insight about your website’s audience and their behavior, which will allow you to make important decisions on how to grow your website or generate more leads and sales for your business.
Knowing how to analyze your website’s traffic isn’t just meant for large enterprise. As a blogger, small boutique, or informational website you’ll want to understand how visitors are interacting with your content. Google Analytics allows you analyze your website’s traffic on a granular level allowing you to see where you can make improvements.
We won’t get into much detail on how to set up goals or funnel tracking (that will be for another post), however, if you’re new to Google Analytics you’ll want to follow these steps on creating your Google Analytics account. You’ll be on your way to becoming a data scientist! Whatever you performance goals may be, you will now have the insight to make informed decisions to meet those goals.
How to Create A Google Analytics Account
To create your Google Analytics account you’ll need to have a Google account. If you don’t have a Google account you’ll want to Create An Account and then continue following the steps below.
Step 1: Sign Into Analytics
Navigate to the Google Analytics Solutions page. In the upper right hand corner you’ll see the text SIGN IN. Click this link and a drop down will appear. In the dropdown menu you’ll want to click the link for Analytics.


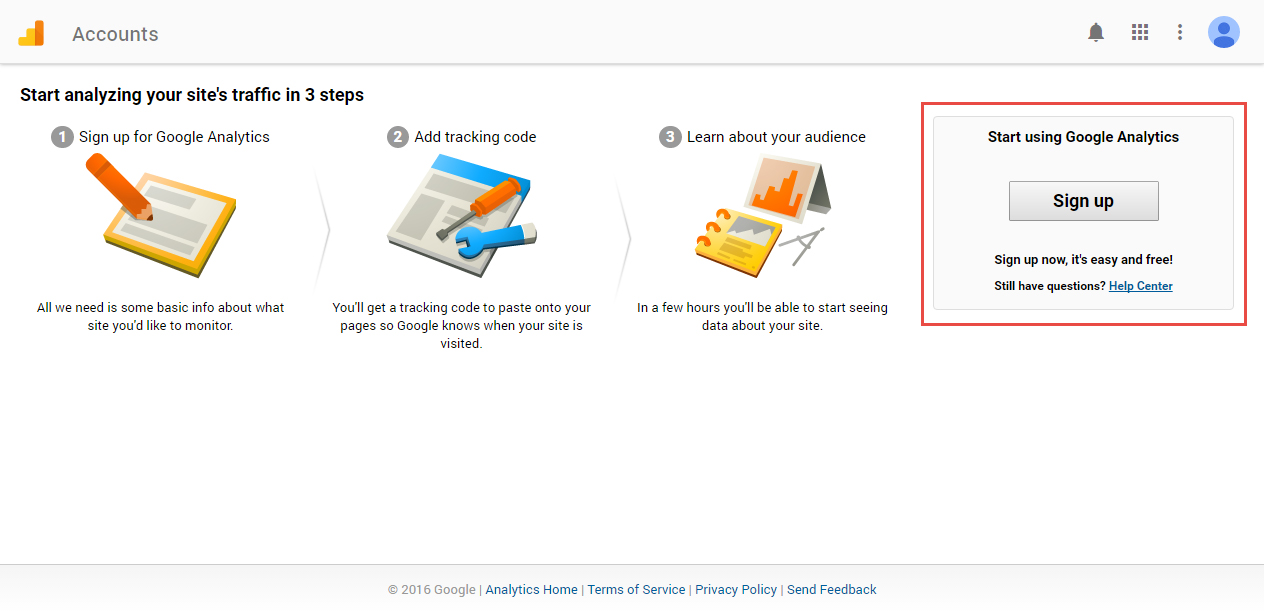
Step 2: Sign Up for Google Analytics
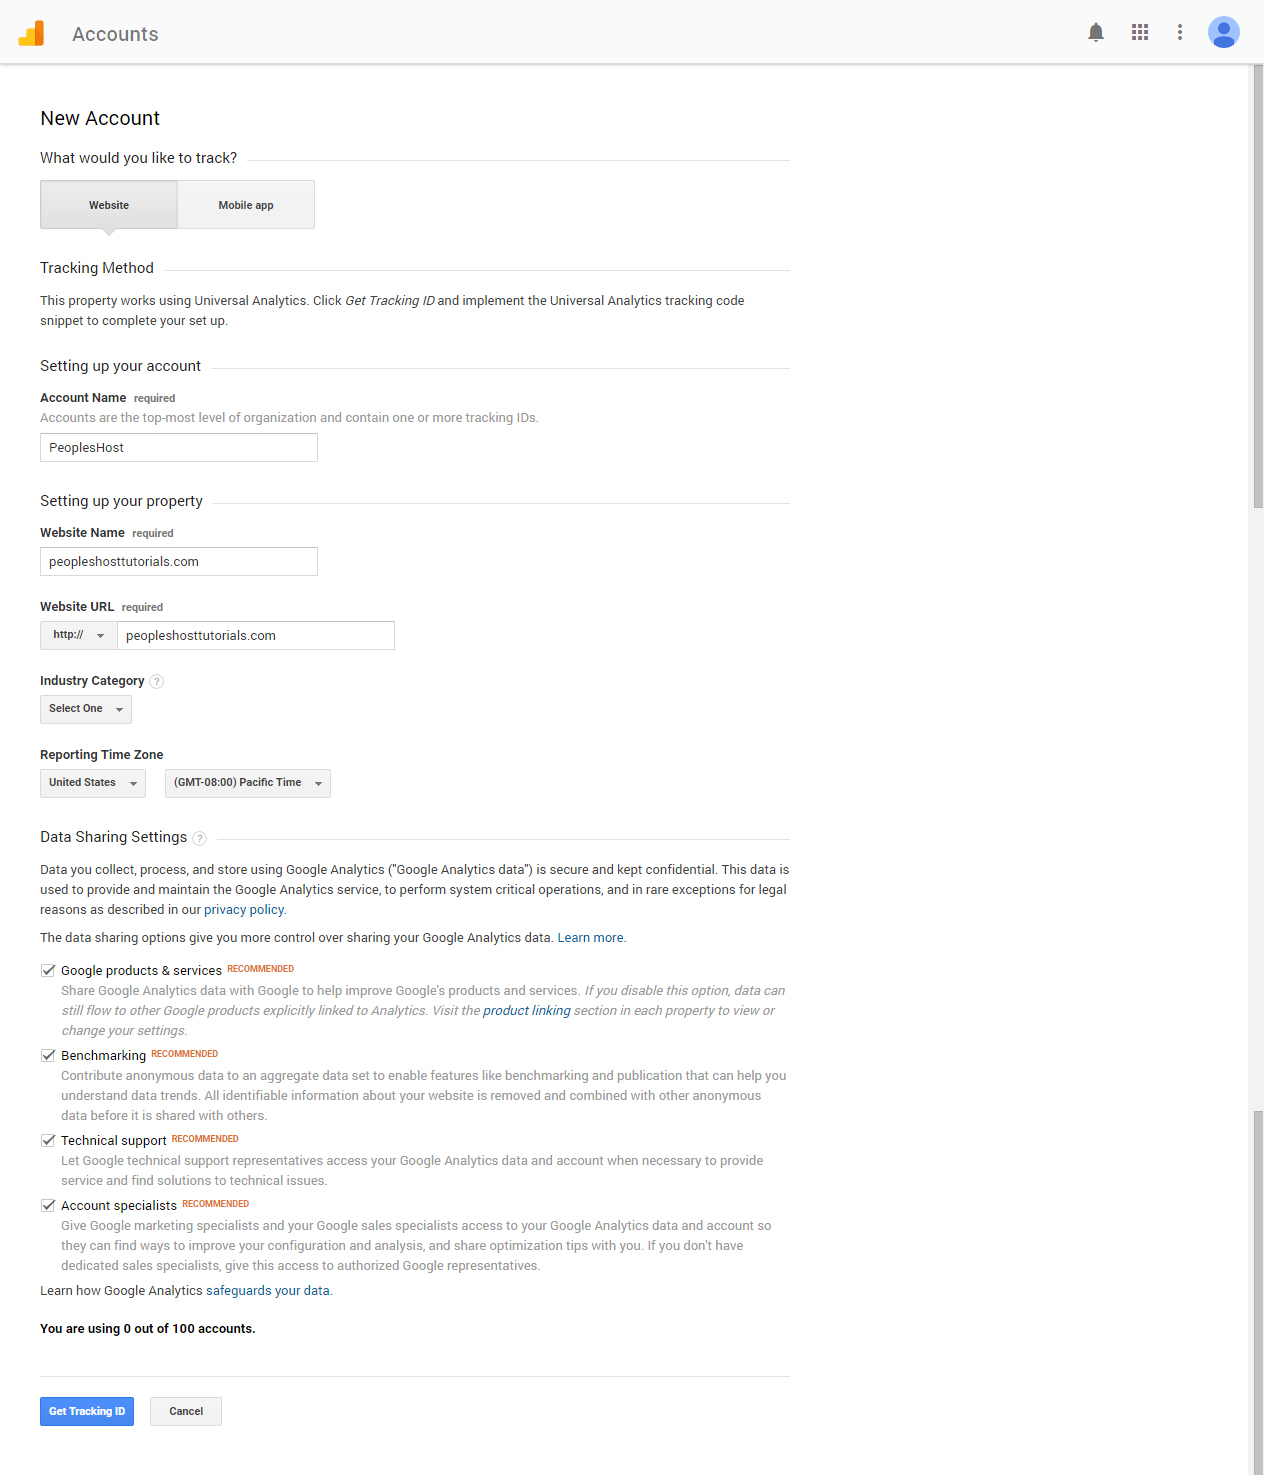
Click on the Sign up button. A new page will load and you’ll need to fill out the details for your new account. Make sure your selection is on Website (it’s pre-selected for you).
The Account Name can be anything you want it to be. Make sure it’s something you will recognize if you have many different sites you are managing. Typically, I like to keep the Account Name similar to my website’s actual name. In this case I’ll use PeoplesHost
The Website Name I’ll use peopleshosttutorials.com.
The Website URL I’ll use peopleshosttutorials.com.
Go ahead and select the Industry Category and Reporting Time Zone that best fits your website. Once you’ve filled out all of the required fields you’ll want to click the Get Tracking ID button at the bottom of the page. A pop up will appear for you to accept the Google Analytics Terms of Service Agreement. Click I Accept.
Step 3: Get Your Tracking ID
After you accept the Terms of Service Agreement you will be taken to the Tracking Code page for this Property. You will see a Tracking ID such as UA-88669954-1 on this page as well as the Universal Analytics code. You’ll want to use the Tracking ID if you’re using some sort of extension or plugin with your website. Otherwise, you’ll need to use the Universal Analytics code on this page and insert it onto your website.
Step 4: Insert Tracking ID or Universal Analytics Tracking Code
Now that you have your UA tracking ID and/or the Universal Analytics Tracking Code you’ll want to enter this information into your site. Typically, for example a WordPress site, the UA tracking ID can be placed into a Google Analytics plugin that you’ve installed. There’s no need to install the code into your site’s files because the plugin will do the job for you.
However, if you want to manually insert the Universal Analytics Tracking Code onto your site you’ll want to either place it in the header or footer of your site before the closing tag.
You may be asking yourself why it needs to be in the header or footer. This is so that you accurately tracking the visitors on your site. The header or footer typically loads on every page a visitor navigates to on your website.
After you’ve successfully set your tracking ID or installed your code you’ll be able to use all of the great features Google Analytics provides to learn about your website’s visitors.
If you have any issues or questions on how to create your Google Analytics account or install the tracking code on your site feel free to reach out to support and one of our experts will be able to help guide you.